¶ MQTT to AWS IoT Core
This guide will walk you though integrating devices that support unencrypted MQTT communications to AWS IoT Core for rapid onboarding with minimal configuration.
¶ Pre-requisites
- Account on Tartabit IoT Bridge.
- Access to an Amazon Web Services (AWS) account.
- Device or client that supports unencrypted MQTT communications.
¶ Details of this guide
- In this guide you will:
- Generate a CA certificate used to authenticate your devices to AWS IoT Core.
- Configure your AWS IoT Core.
- Import a solution template, this will create all of the required triggers, services, and endpoints required to connect your device.
- Connect your first device.
- Verify that the device is properly reporting into the AWS IoT Core.
¶ 1. Generate a CA certificate
Before you begin, you must generate a CA certificate. This can be done using multiple tools, but this guide will use openssl to generate the CA certificate.
The example below is good for most use cases, but you may wish to consult with your IT security department for recommended certificate practices for your organization.
# generate a new private key in PKCS#8 format.
openssl genpkey -algorithm RSA -out aws_iot_ca.key8.pem

# convert the private key from PKCS#8 to PKCS#1 format.
openssl pkey -in aws_iot_ca.key8.pem -traditional -out aws_iot_ca.key1.pem

# generate a certificate based on the private key good for 10 years.
openssl req -x509 -new -key aws_iot_ca.key8.pem -out aws_iot_ca.cert.pem -days 3650
Save the three PEM files for use later in the process.
¶ 2. Preparing your AWS IoT Core
In general, to allow bridging of MQTT connections to AWS IoT Core, we will need to create a just-in-time provisioning template in your AWS IoT Core. This guide is assuming you have a "new" IoT Core with no previous configuration, and may need to be adjusted if you already have some definitions in your IoT Core configuration.
¶ 2.1 Gather required information
- 2.1.1 - Find your
AWS Account ID, this can be found by clicking on your username in the top right of the AWS Console, the Account ID is a 12 digit number with no hyphens. - 2.1.2 - Find the
AWS Regionname that you wish to use for AWS IoT Core, this can be found by clicking the dropdown to the left of your username, it will be in the format ofus-east-1or similar. - 2.1.3 - Find your
AWS IoT Core Endpoint, this can be found by navigating toIoT Corein the AWS Console, then clicking onSettings. You want theDevice data endpointthat will be in the form of:annxsw26vrtr-ats.iot.us-east-2.amazonaws.com
¶ 2.2 Import CA to AWS IoT Core
We need to import the CA certificate we created to allow for devices to automatically connect and be authenticated.
- 2.2.1 - Navigate to
Security -> Certificate authoritiesin your AWS Console. - 2.2.2 - Click
Register CA certificateto register a new certificate. - 2.2.3 - Enter the following information:
- 2.2.3.1 - Register CA in Multi-account mode
- 2.2.3.2 - Click
Choose CA certificateand select the file we previously createdaws_iot_ca.cert.pemand upload it. - 2.2.3.3 - Set
CA statustoActive. - 2.2.3.4 - Set
Automatic certificate registrationtoOn. - 2.2.3.5 - Click
Registerto register the new certificate authority.
¶ 2.3 Create a Security Policy
We must create a security policy to allow devices to connect and subscribe to topics. If you already have a security policy defined, you can skip this step. For production use cases, you will most likely have a pre-defined security policy.
This is a sample policy that allows devices to publish and subscribe to any topics with a prefix of
iotb, policies will need to be customized for your AWS IoT Core use cases.
-
2.3.1 - Navigate to
Security -> Policiesin your AWS Console.
POLICY OVERVIEW -
2.3.2 - Click
Create policyto create a new policy. -
2.3.3 - Enter information for the policy:
- 2.3.3.1 - Enter a name for your policy, for example "IoT_Bridge_Device_Policy".
- 2.3.3.2 - Click the
JSONbutton to switch to the JSON builder for the Policy document. - 2.3.3.3 - Paste the following sample policy into your AWS console:
{ "Version": "2012-10-17", "Statement": [ { "Effect": "Allow", "Action": [ "iot:Publish", "iot:Receive", "iot:PublishRetain" ], "Resource": [ "arn:aws:iot:<aws-region>:<aws-account-id>:topic/iotb/*", "arn:aws:iot:<aws-region>:<aws-account-id>:topic/$aws/things/${iot:Connection.Thing.ThingName}/*" ] }, { "Effect": "Allow", "Action": "iot:Subscribe", "Resource": [ "arn:aws:iot:<aws-region>:<aws-account-id>:topicfilter/iotb/*", "arn:aws:iot:<aws-region>:<aws-account-id>:topicfilter/$aws/things/${iot:Connection.Thing.ThingName}/*" ] }, { "Effect": "Allow", "Action": "iot:Connect", "Resource": "arn:aws:iot:<aws-region>:<aws-account-id>:client/*" } ] }- 2.3.3.4 - In the JSON you pasted, you must update the
aws-regionandaws-account-idin the resources with your region and account id saved above. - 2.3.3.5 - Click
Createto create your policy.
¶ 2.4 Create a Provisioning Template
The last step to configure AWS IoT Core is to create a Provisioning Template, which will enable devices to automatically connect to your AWS IoT Core.
- 2.4.1 - Navigate to
Connect many devices -> Connect many devicesin the AWS Console. - 2.4.2 - Click
Create provisioning templateto create a new template. - 2.4.3 - Enter the following for your template:
- 2.4.3.1 - Set
Provisioning scenariotoProvisioning devices with unique certificates (JITP). - 2.4.3.2 - Click
Next. - 2.4.3.3 - Set
Provisioning template statustoActive. - 2.4.3.4 - Set
Provisioning template nameto anything you like, such asIoT_Bridge_Provisioning_Template. - 2.4.3.5 - Click
Create new roleto create a new role for the provisioning template.- 2.4.3.5.1 - Set
Role nameto anything you like, such asIoT_Bridge_Provisioning_Role. - 2.4.3.5.2 - Click
Createto create the new role. - 2.4.3.5.3 - Ensure the role you created is selected in the
Provisioning rolefield.
- 2.4.3.5.1 - Set
- 2.4.3.6 - Set
CA certificateto the certificate you uploaded above, you should only have one certificate to select from. - 2.4.3.7 - Set
Automatic certificate registrationtoOn. - 2.4.3.8 - Click
Next. - 2.4.3.9 - Click the toggle to enable
Automatically create a thing resource when provisioning a device. - 2.4.3.10 - Click
Next. - 2.4.3.11 - Select the previously defined
Device Policyto attach to devices that are created through the template. - 2.4.3.12 - Click
Next. - 2.4.3.13 - Review the information you provided.
- 2.4.3.14 - Click
Create template.
You are now done with the AWS Console configuration for your solution.
- 2.4.3.1 - Set
¶ 3 Configuring the IoT Bridge
¶ 3.1. Import the solution template
The solution template defines all of the resources in your IoT Bridge to enable the MQTT to AWS IoT Core connections.
-
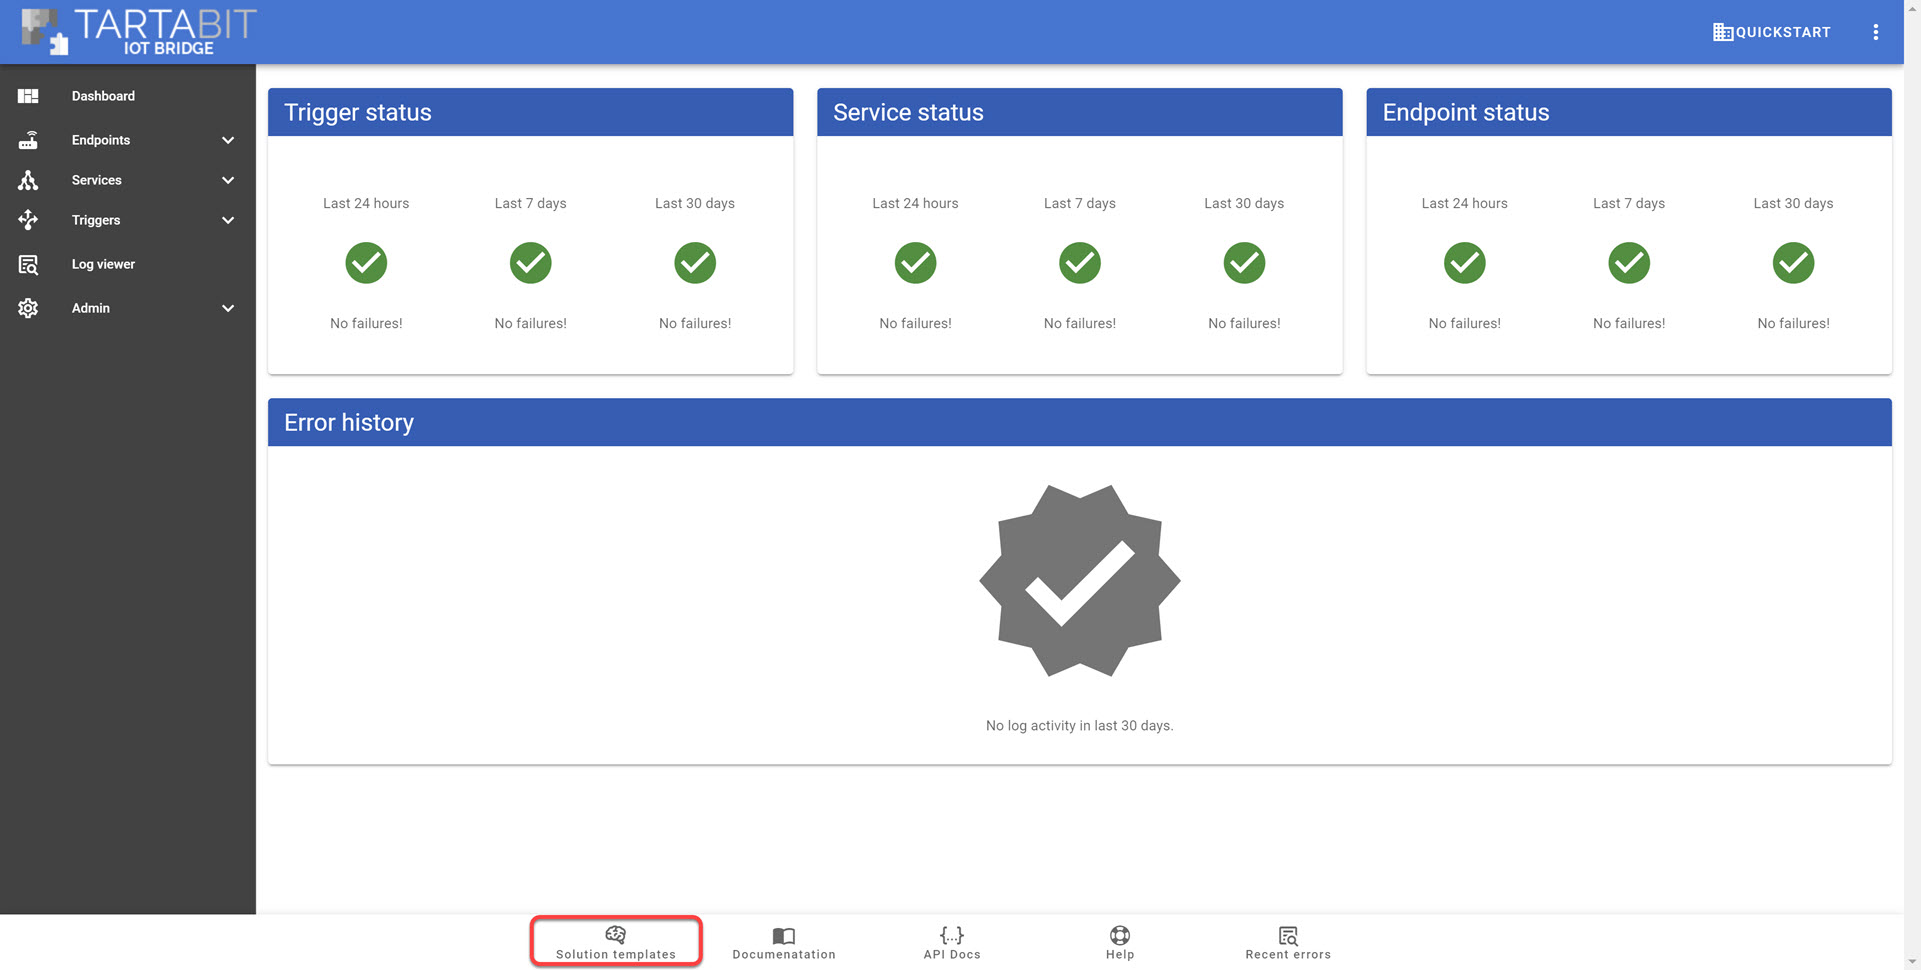
3.1.1 - Click Solution Templates at the bottom of any page.

-
3.1.2 - Find the MQTT to AWS IoT Core template and click Import.
-
3.1.3 - Fill in the template as follows:
- 3.1.3.1 -
AWS IoT Core Endpoint: The MQTT endpoint for your AWS IoT Core service. - 3.1.3.2 -
Activity timeout: The amount of time to keep connections to AWS IoT Core open, idle connections will be closed after this interval. - 3.1.3.3 -
AWS IoT Core CA Certificate: The CA certificate created above. - 3.1.3.4 -
AWS IoT Core CA Private Key: The CA private key created above. - 3.1.3.5 - The
MQTT Registration UsernameandMQTT Registration Passwordare used to authenticate unencrypted MQTT to the IoT Bridge and establish the connection to the AWS instance. Record these values for later.
- 3.1.3.1 -
-
3.1.4 - Check Start triggers so the triggers will automatically start upon import.
-
3.1.5 - Click Import.
-
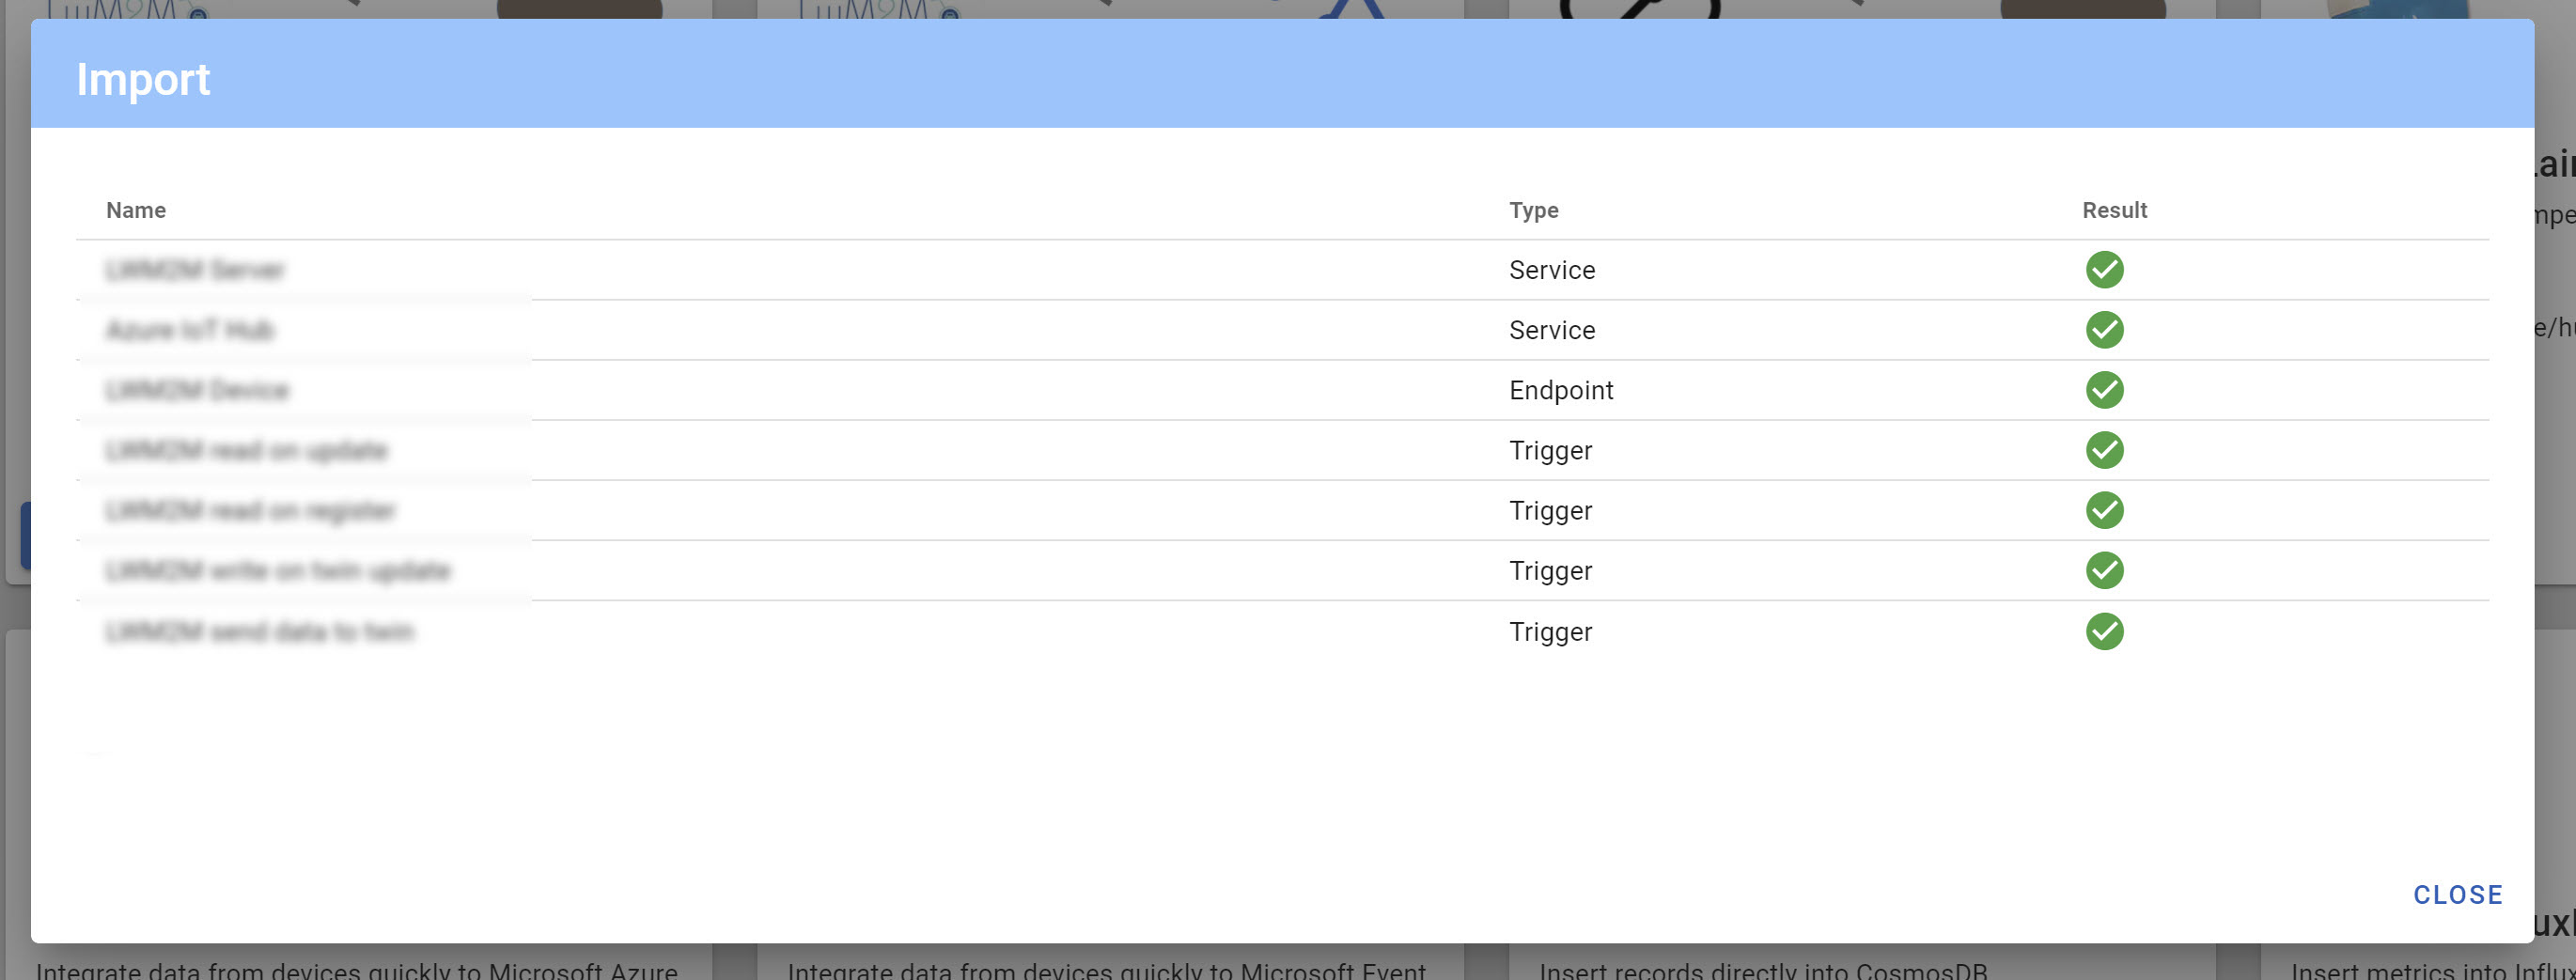
3.1.6 Verify the import was successful:

¶ 4. Connect your MQTT client
Now that everything has been imported, you can connect your first MQTT client.
There are a variety of clients that you can use, for all of them, the parameters will be the same:
- URL: The MQTT endpoint for your IoT Bridge instance.
- Username: The registration username from the template import.
- Password: The registration password from the template import.
- Client ID: The client ID you use in the MQTT client will be used as the Thing Name in AWS IoT Core.
If you did not save the username and password, they can be retrieved by navigating to
Servicesand editing theProxy MQTTservice and checking the auto-registration tab.
If you setup any subscriptions or publishes in your client, ensure they are valid for the
Security Policyyou defined above. If you subscribe or publish to topics not authorized in your policy your client will be immediately disconnected.
You should see your MQTT client connected without errors.
¶ 5. Check your device in AWS IoT Core
With the device connected, you should now see it connected in AWS IoT Core.
¶ 5.1. Check that your device was created
You can verify that your device was properly created by navigating to the things view in the AWS Console.
- 5.1.1 - Navigate to
IoT Corein the AWS Console. - 5.1.2 - Navigate to
Add devices -> thingsin IoT Core. - 5.1.3 - Verify your device is present.
¶ 5.2. Prepare the test client in the AWS Console
We will use the built in test client to verify data flow in AWS IoT Core.
- 5.2.1 - Navigate to
Test -> MQTT test clientin IoT Core. - 5.2.2 - Under the tab
Subscribe to a topic, set the topic filter toiotb/#(if using the recommended security policy), or another topic that matches your security policy. - 5.2.3 - Click
Subscribe. - 5.2.4 - Keep this browser window open to see incoming publishes.
¶ 5.3. Send a test publish from the client
- 5.3.1 - Publish a test message on topic
iotb/testwith any value you wish. - 5.3.2 - Check your
MQTT test clientfrom the previous step. You should see the message under subscriptions.
¶ 5.4. Send a publish from AWS IoT Core to your client
- 5.3.2 - Have your client subscribe to topic
iotb/device. - 5.3.3 - In the
MQTT test clientfrom the previous step, clickPublish to a topic. - 5.3.4 - Set
Topic Nametoiotb/device. - 5.3.5 - Click
Publish. - 5.3.6 - Verify that the publish was received by your device.
¶ You are done!
You can now connect multiple devices using the same shared auto-onboarding credentials. Each client will be allocated a connection based on its MQTT Client ID.