¶ Queclink to Azure IoT Hub
This guide will walk you though integrating a Queclink device to Azure IoT Hub using an available solution template.
¶ Pre-requisites
- Account on Tartabit IoT Bridge.
- Access to a Microsoft Azure subscription.
- Queclink
GL500orGV500devices.
¶ Details of this guide
- In this guide you will:
- Create a new Azure IoT Hub.
- Retrieve the credentials needed to connect to your Azure IoT Hub.
- Import a solution template, this will create all of the required triggers, services, and endpoints required to connect your device.
- Connect a Queclink device
- Verify that the device is properly reporting into the Azure IoT Hub.
¶ 1. Create an IoT Hub in Azure
If you already have an IoT Hub, you can skip this step.
For a detailed walkthrough from Microsoft, check out the following link:
https://docs.microsoft.com/en-us/azure/iot-hub/iot-hub-create-through-portal
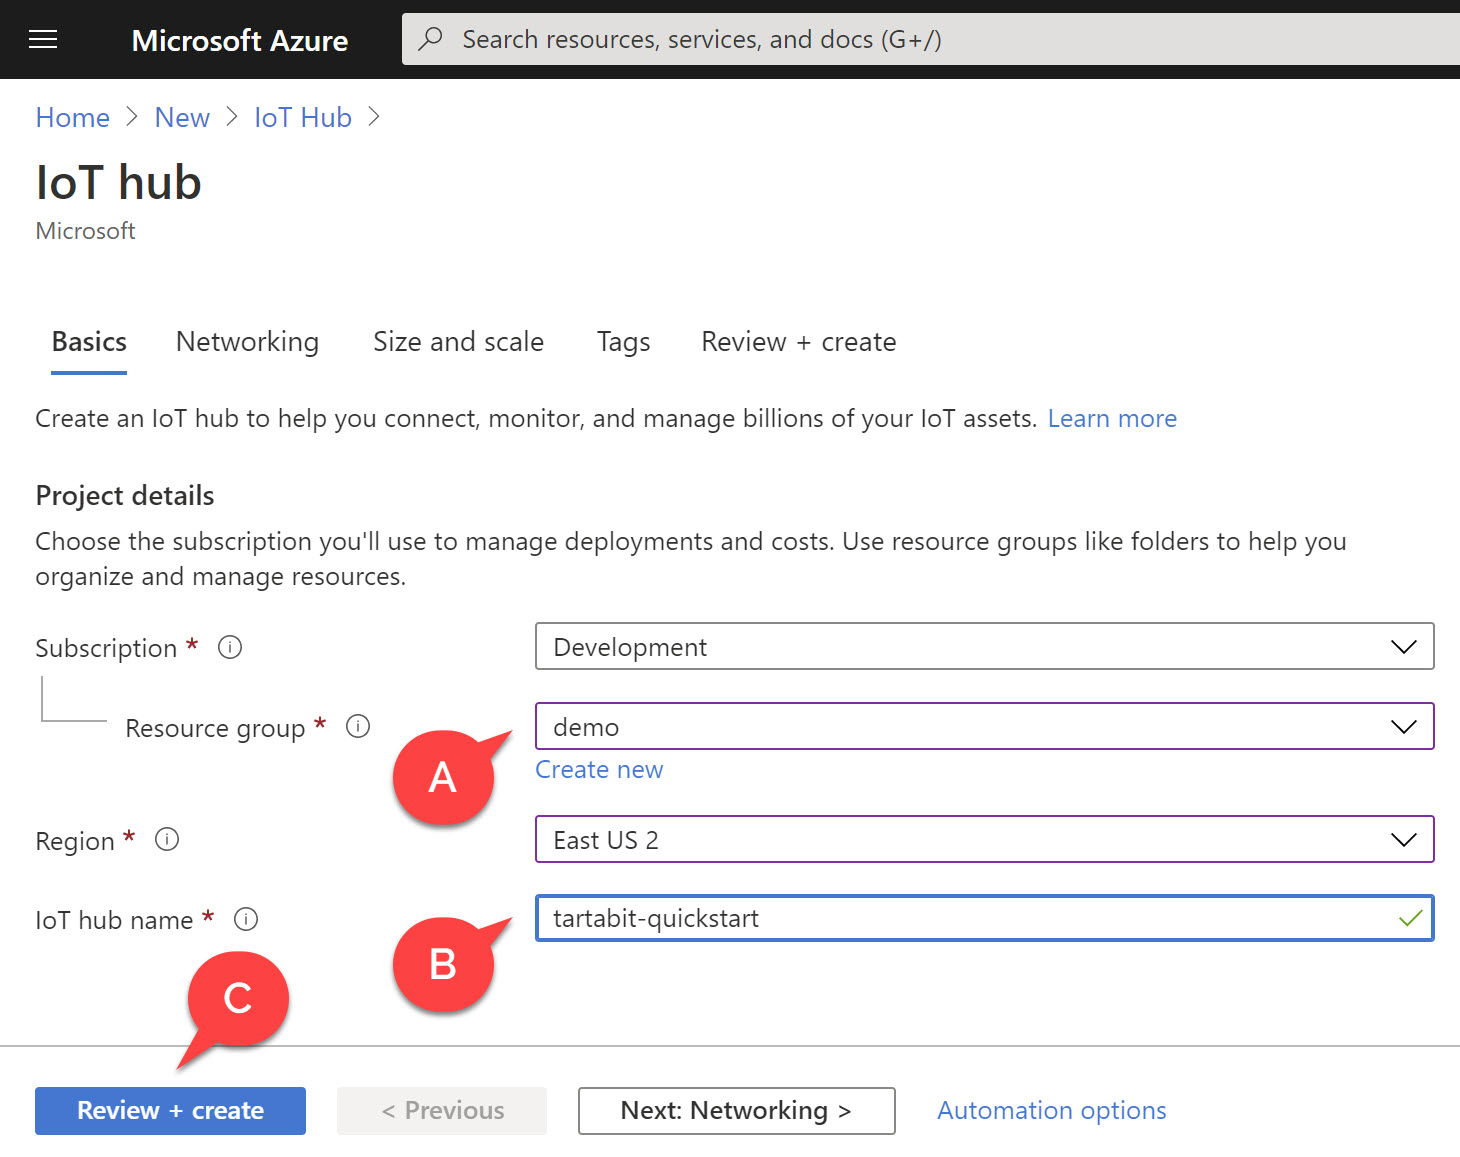
- A: Select an existing resource group or create one.
- B: Provide a unique name for your IoT Hub.
- C: You can skip the other tabs and create a new Hub.
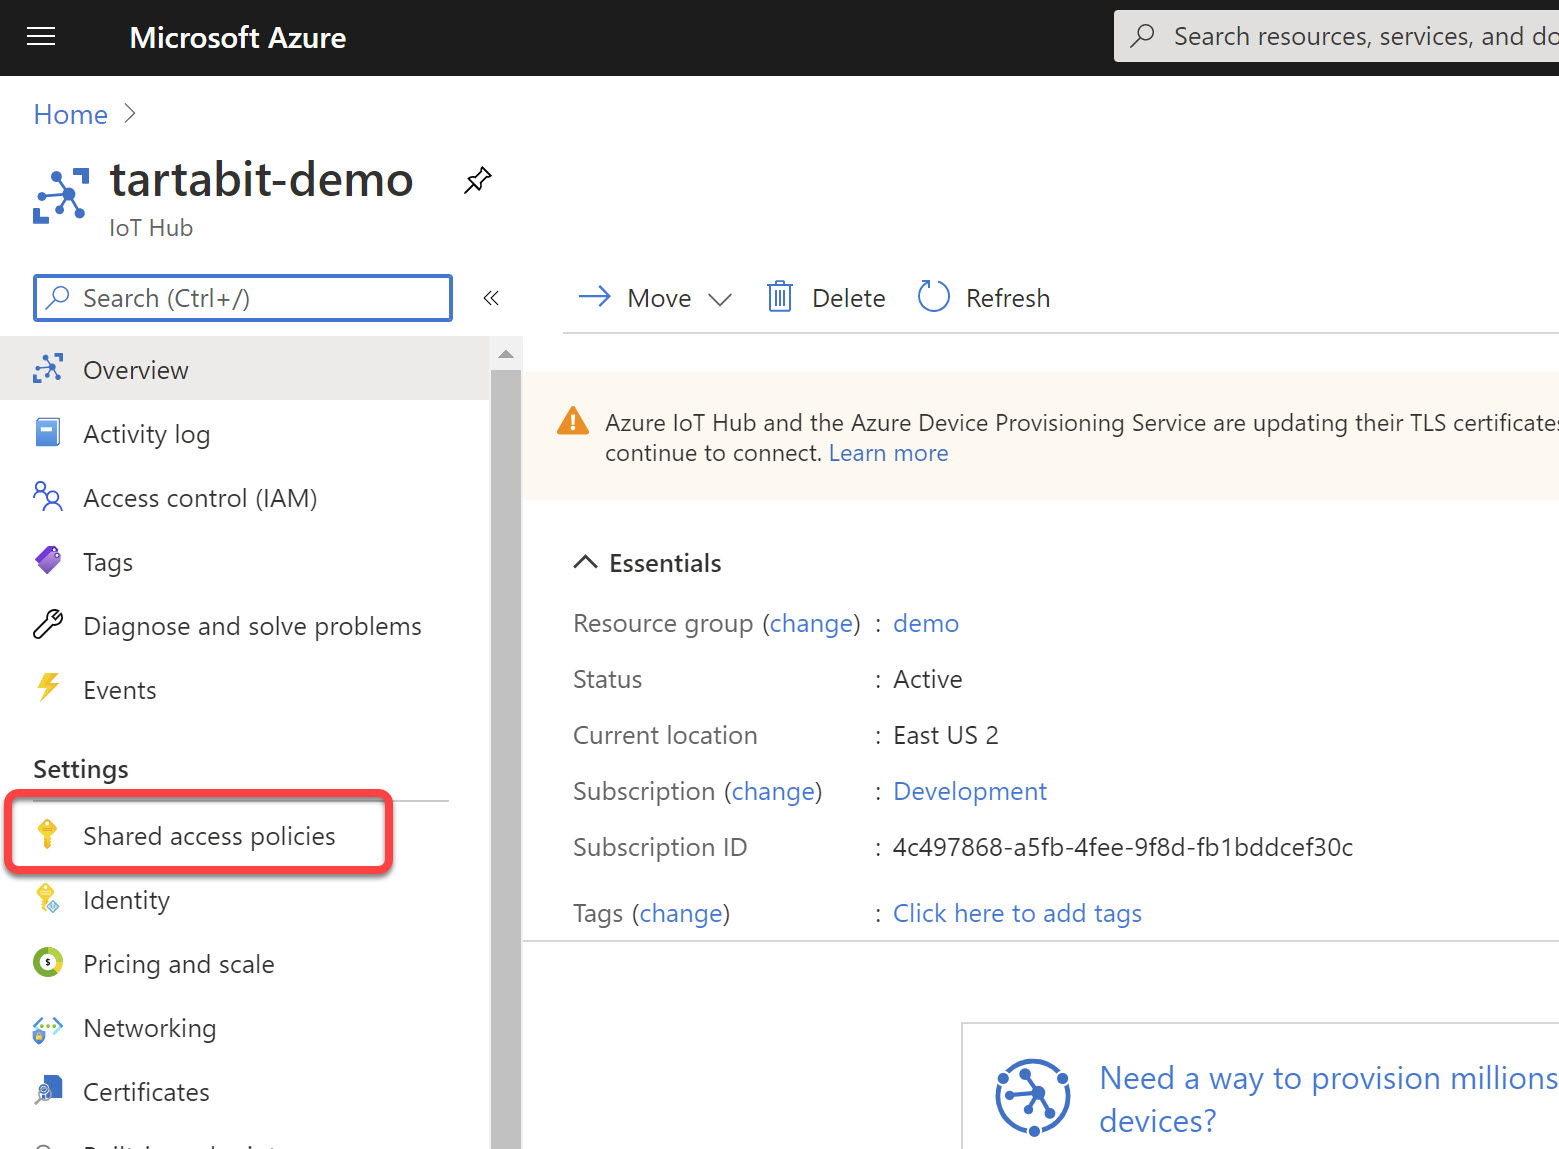
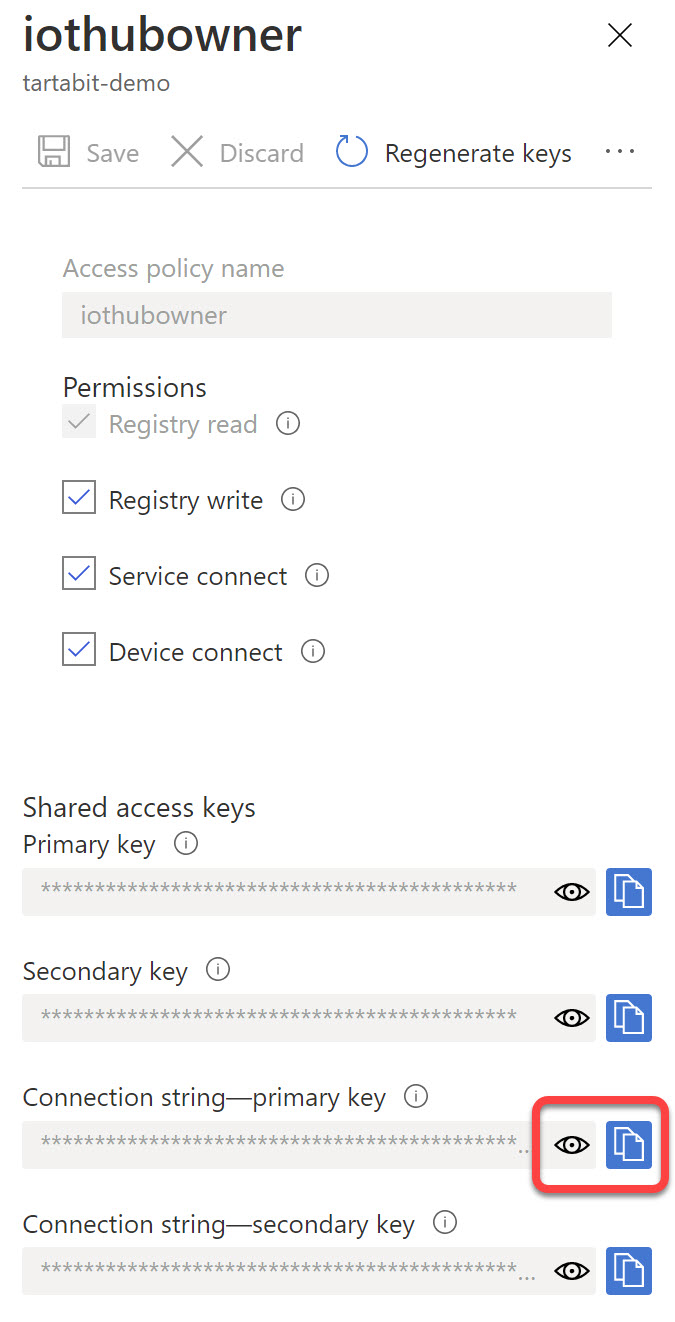
¶ 2. Retrieve your IoT Hub connection string
- Navigate to your new Azure IoT Hub.
- Click Shared Access Policies.
- Select iothubowner (this is required because the IoT Bridge will automatically provision devices in the IoT Hub as they are needed).
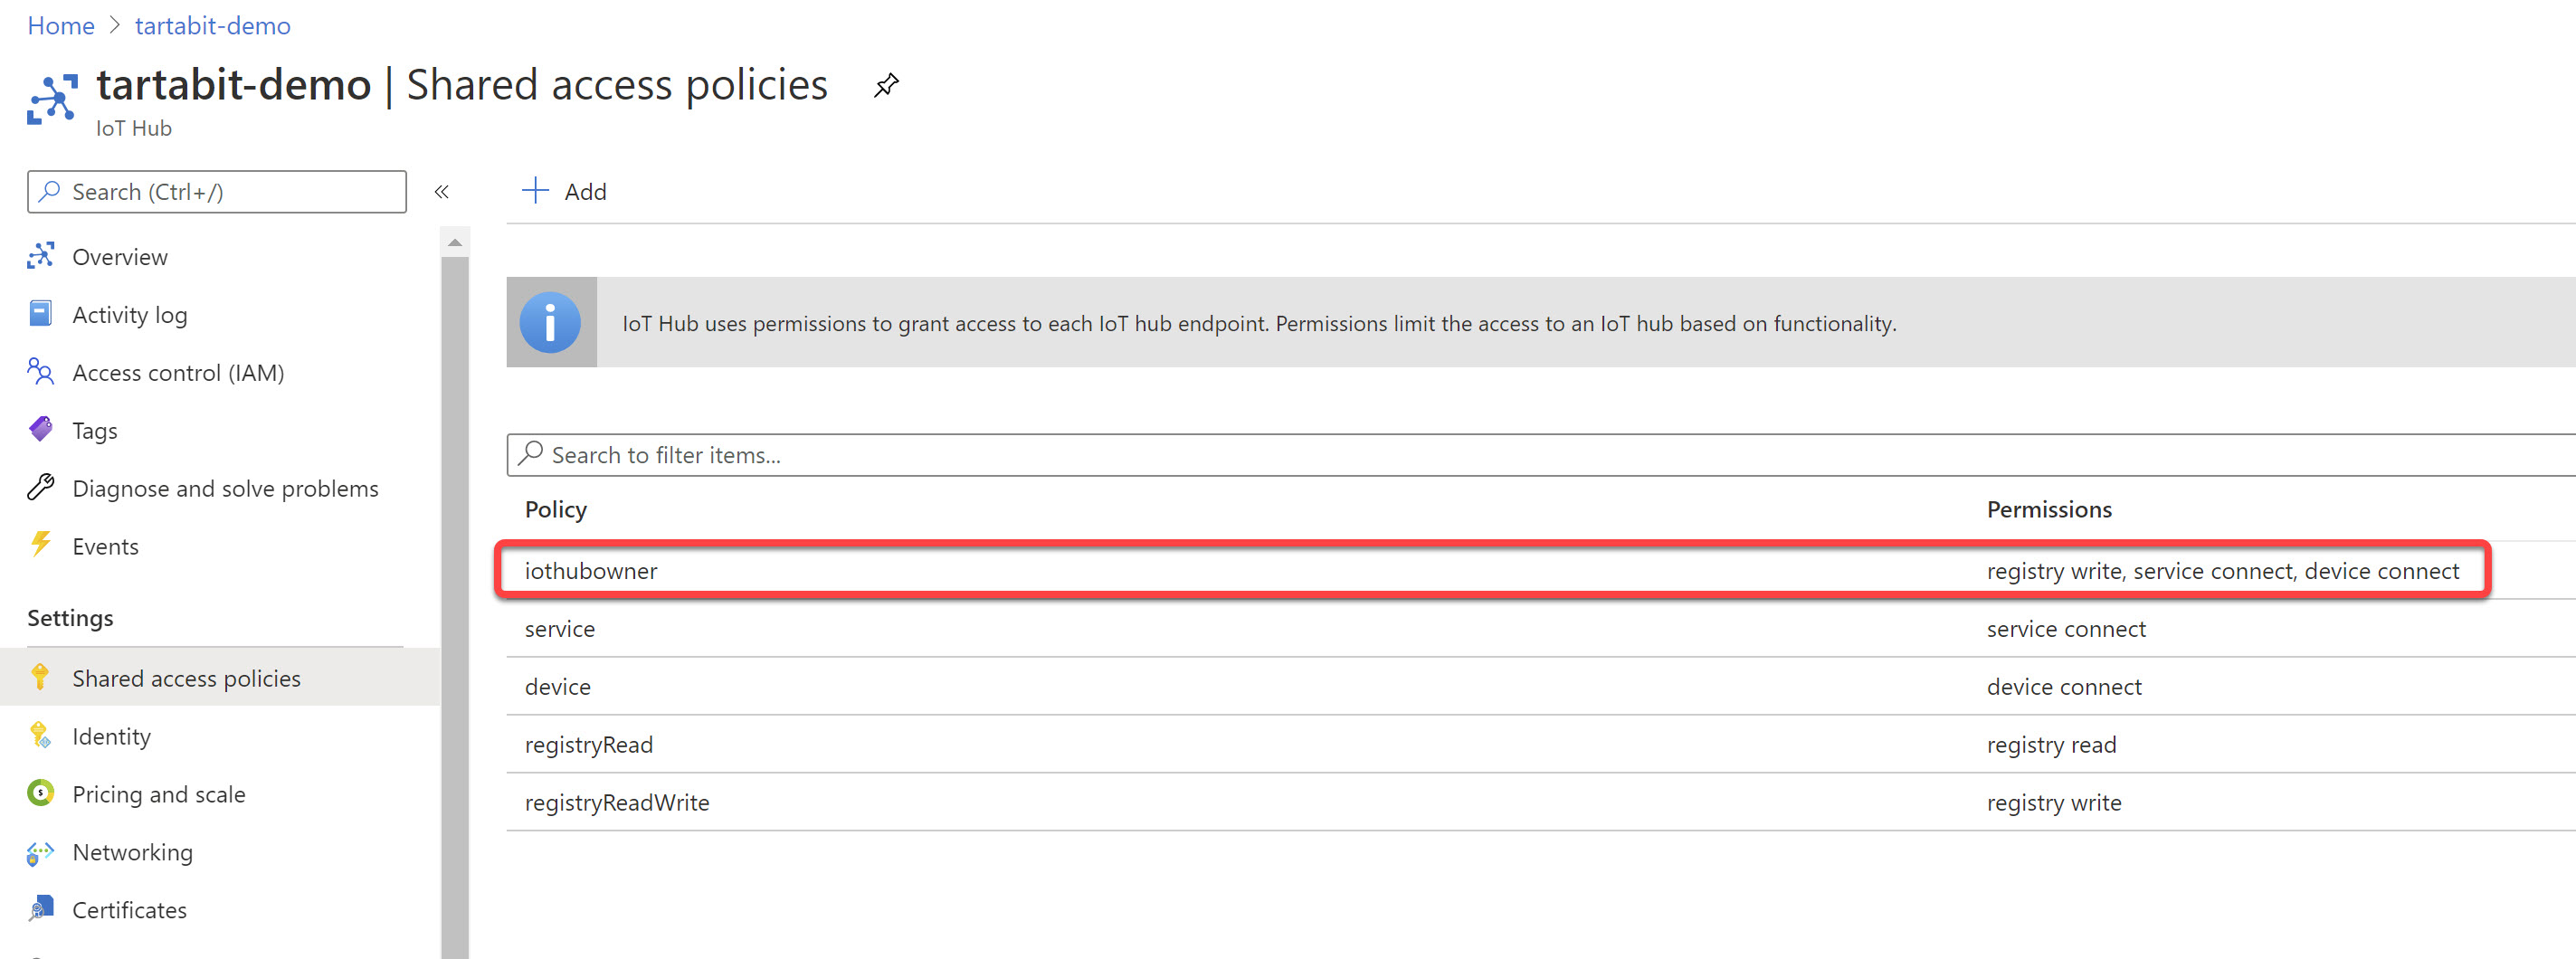
- Copy the Connection string - primary key value and save it for later.
¶ 3. Prepare a Queclink device
Ensure your devices is configured according to the instructions below to ensure accurate reporting.
¶ GV500 device
- Configure backend server registration
- Report Mode:
UDP mode - Main Server IP:
queclink-us.tartabit.com(or the correct URL for your server). - Main Server Port:
10000 - Buffer Mode:
0: Disable - Protocol Format:
HEX
AT+GTSRI=gv500,4,,0,queclink-us.tartabit.com,10000,,0,,0,0,1,0,,,FFFF$
- Ensure the correct minimum hex report masks are present, the
RSP MaskandEVT Maskmust have the following fields enabled:
- Check Device Type
- Check Length
- Uncheck Device Name (highly recommended to use IMEI instead of custom name)
AT+GTHRM=gv500,,,6F,FDF7FF,FC37FF,FD7D,EF,7D,7D,,,FFFF$
¶ GL500 device
- Configure backend server registration
- Report Mode:
UDP mode - Main Server IP:
queclink-us.tartabit.com(or the correct URL for your server). - Main Server Port:
10000 - Buffer Mode:
0: Disable - Protocol Format:
HEX
AT+GTSRI=gl500m,4,1,0,queclink-us.tartabit.com,10000,,0,,0,0,0,0,1,,FFFF$
- Ensure the correct minimum hex report masks are present, the
RSP MaskandEVT Maskmust have the following fields enabled:
- Check Device Type
- Check Length
- Uncheck Device Name (highly recommended to use IMEI instead of custom name)
AT+GTHRM=gl500m,,,7F,FF6F,FF6F,F77F,7F,,,,,FFFF$
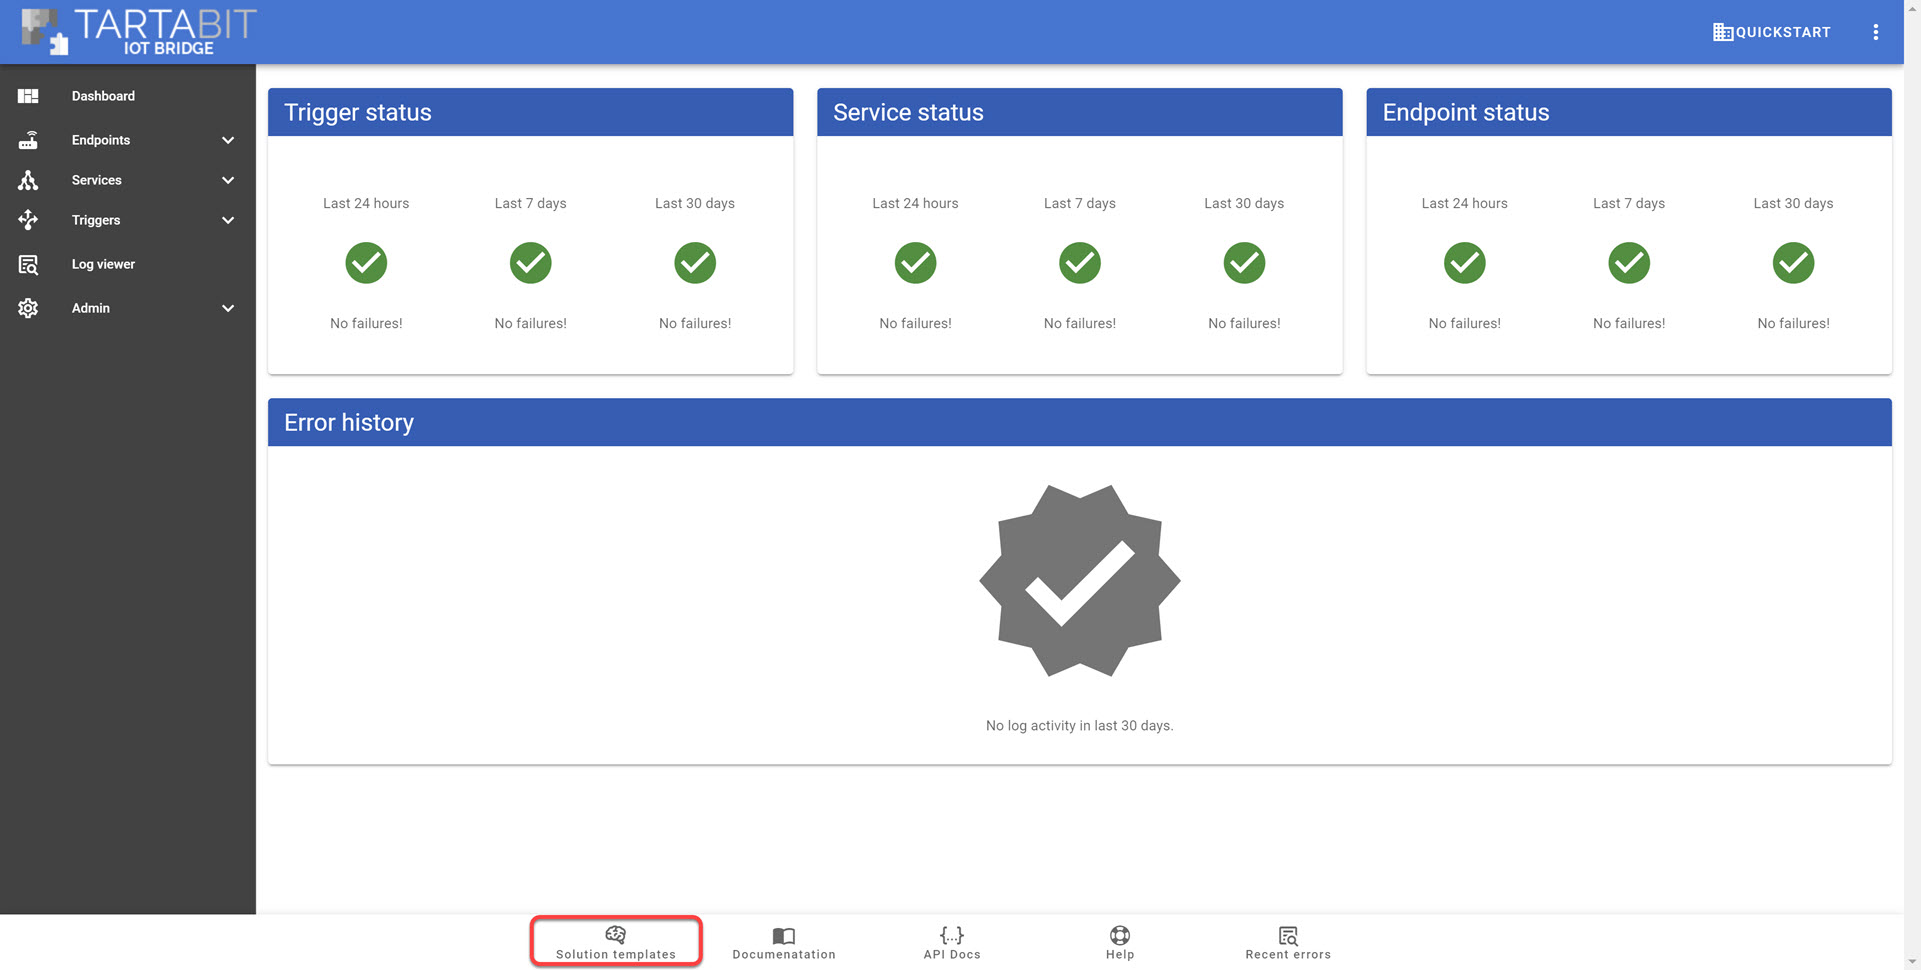
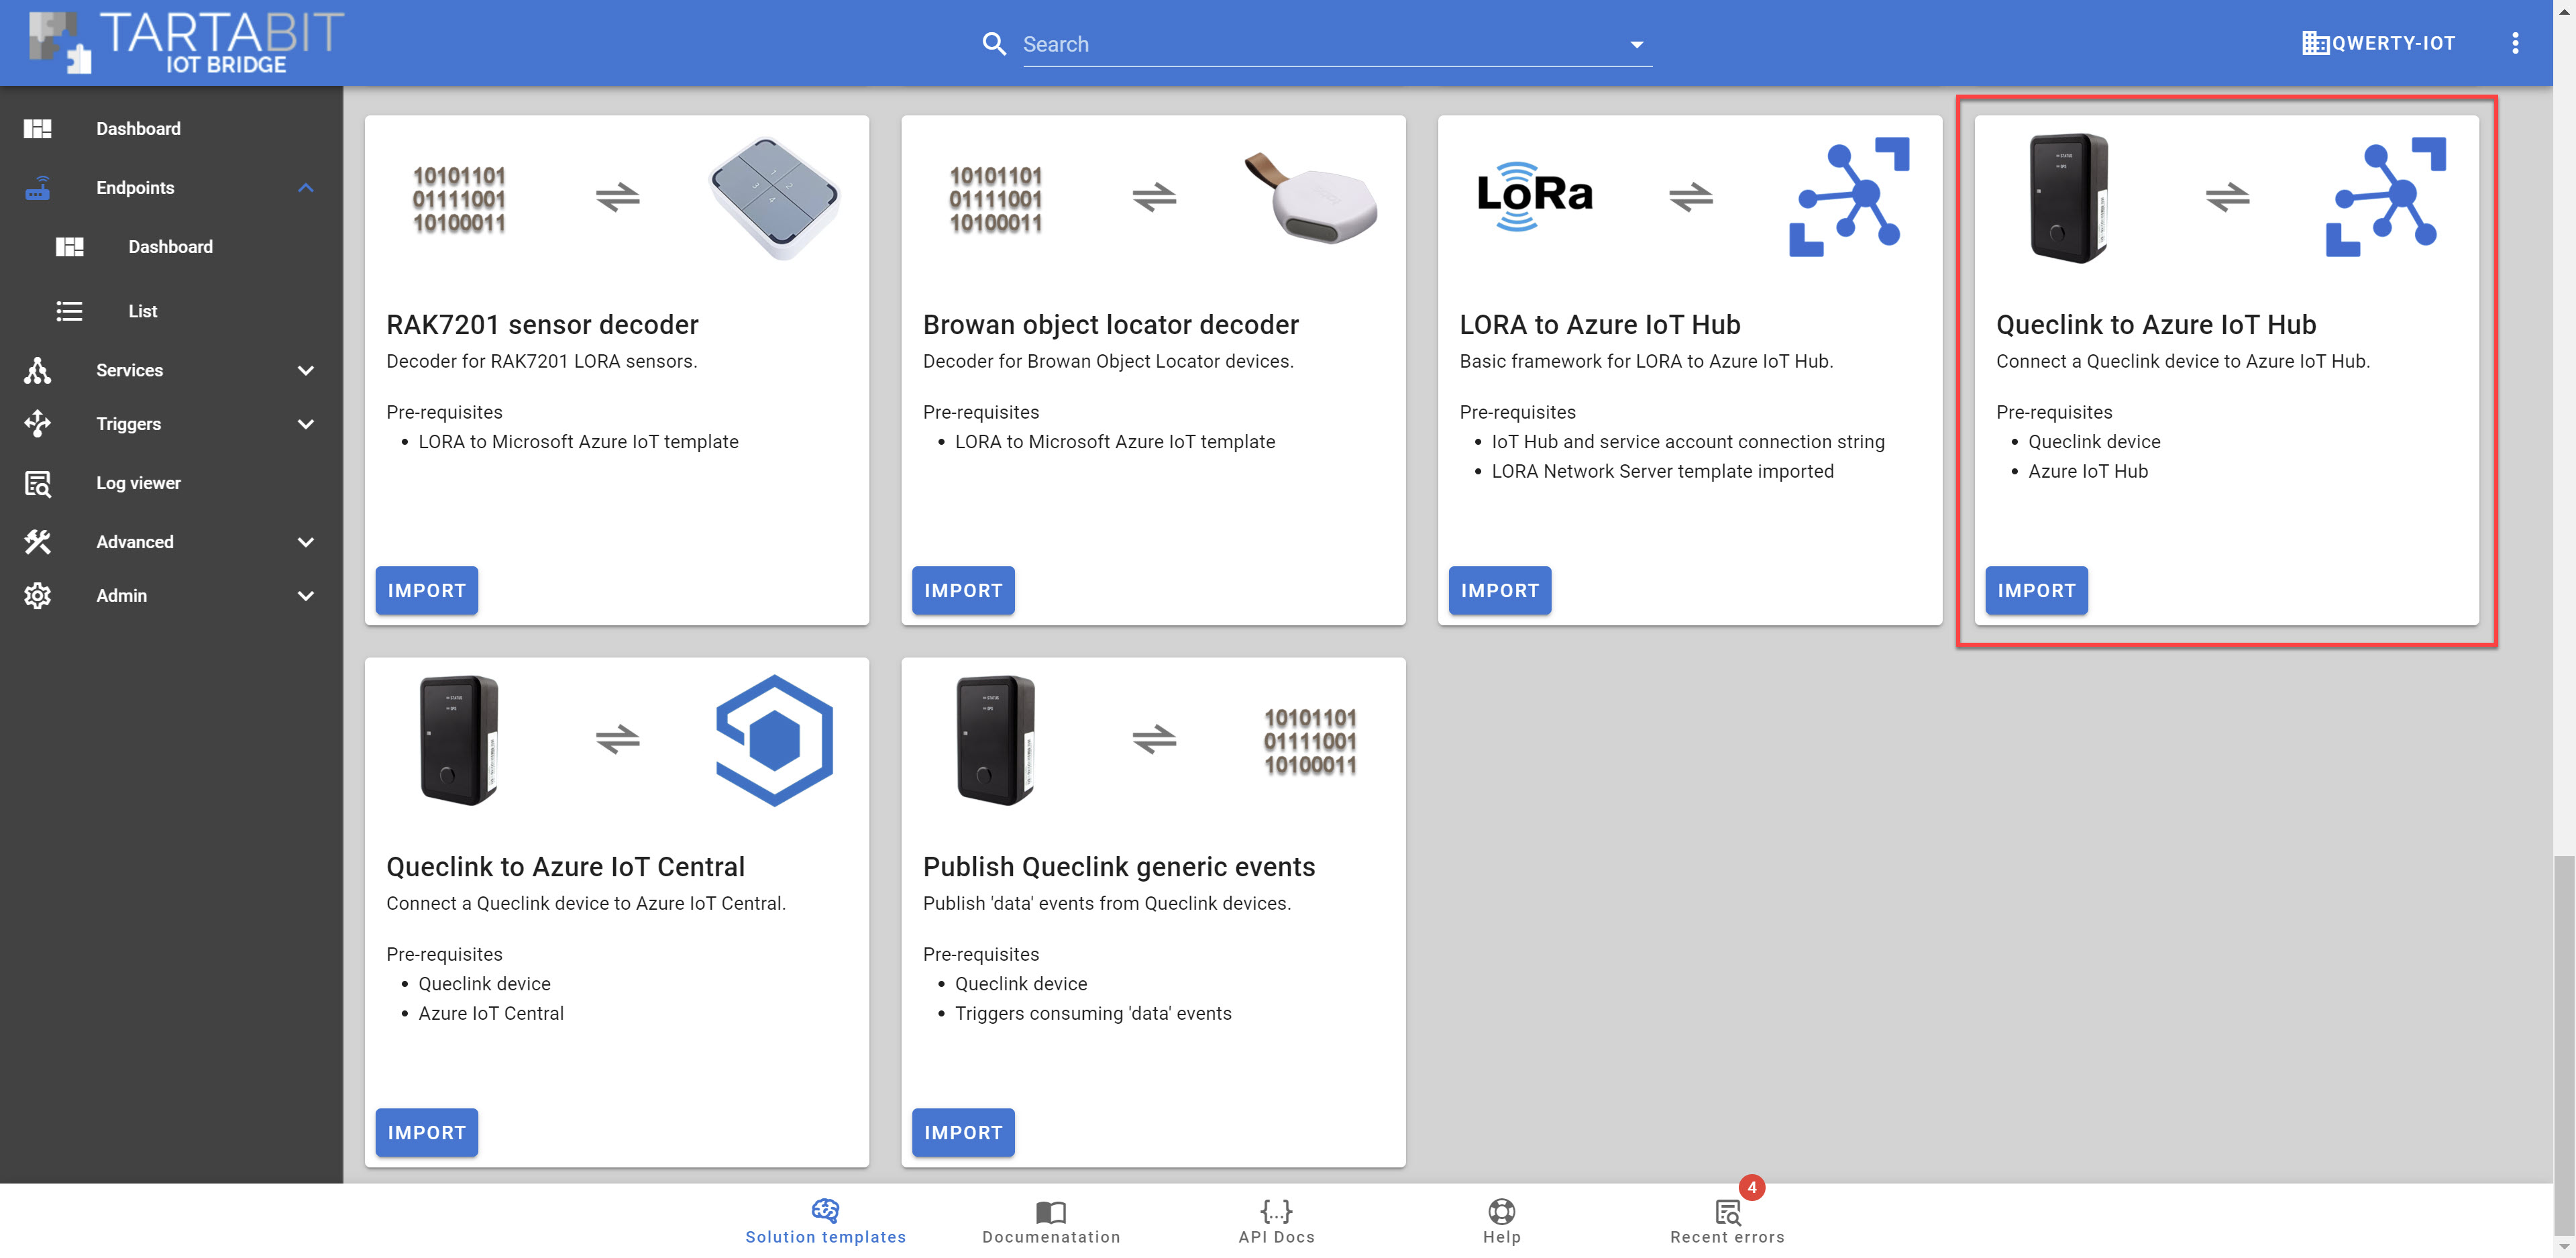
¶ 4. Import the solution template
Follow the steps below to import the solution template:
-
Click Solution Templates at the bottom of any page.
-
Find the Queclink to Microsoft Azure IoT Hub template and click Import.
-
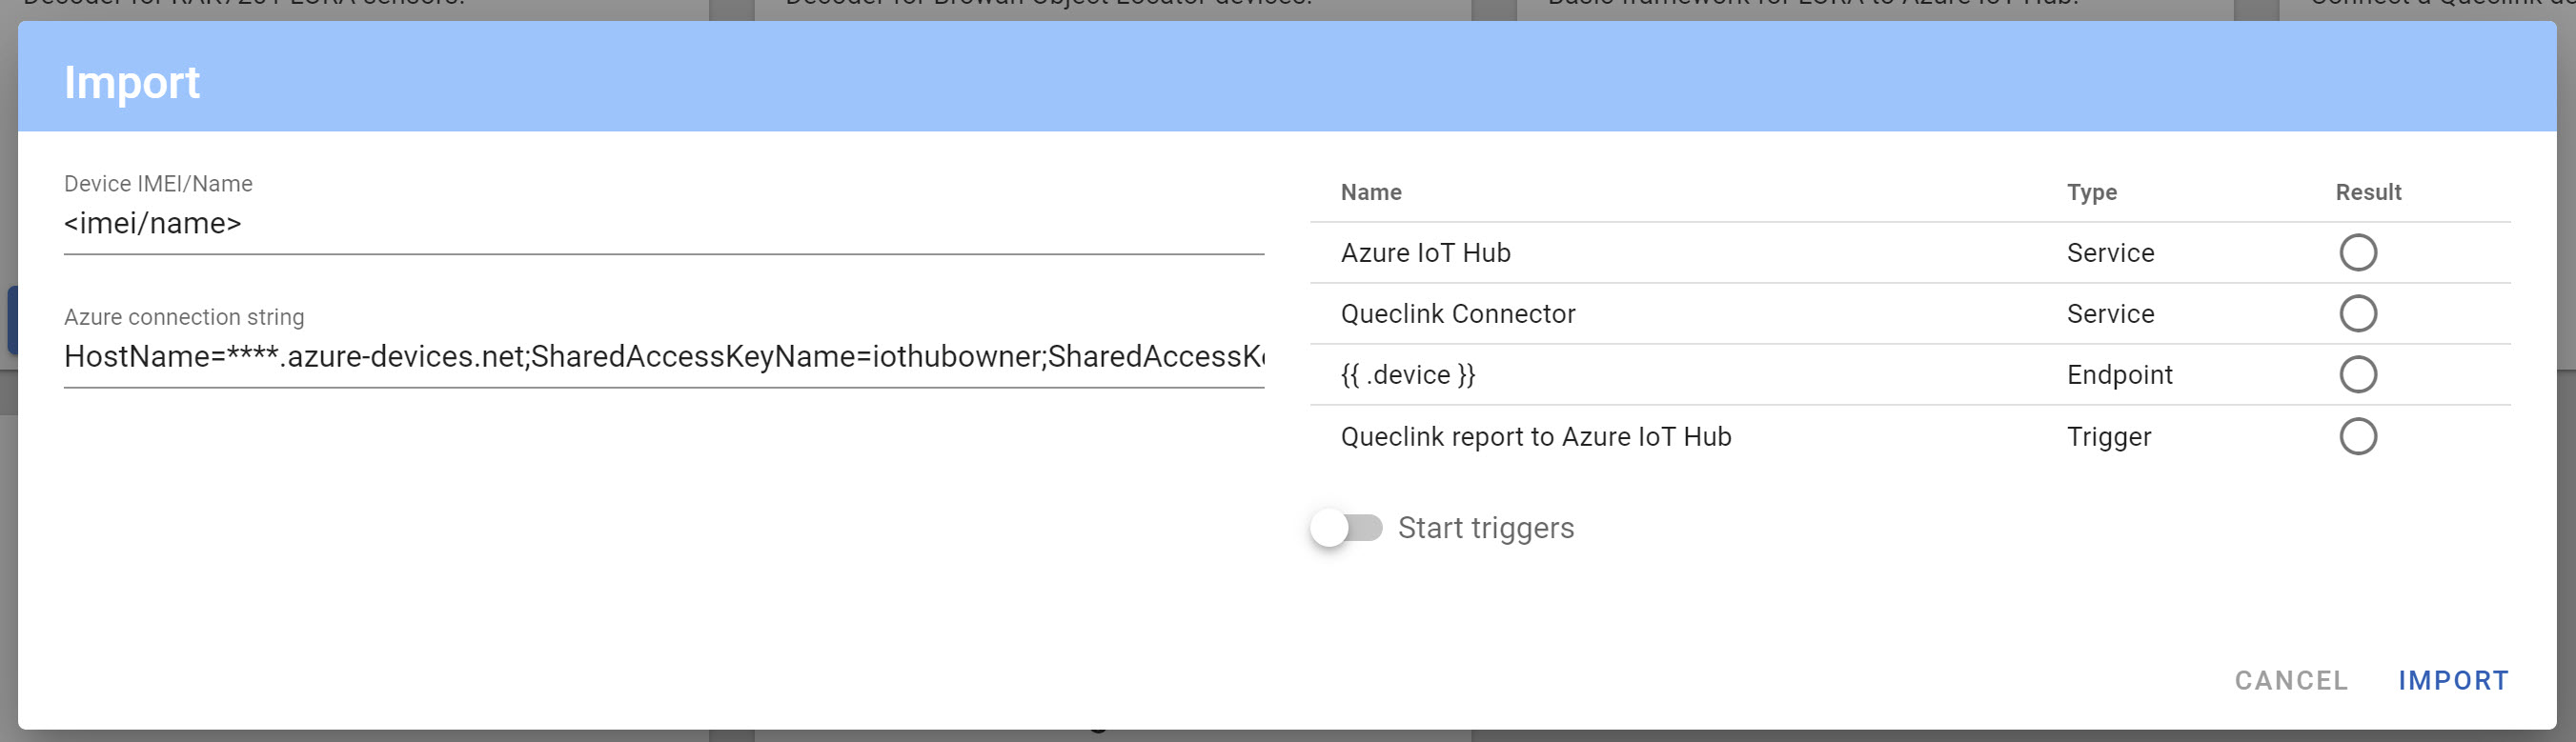
Follow the instructions below to import the template:
- A: Enter the IMEI or device name of your device.
- B: Enter the Azure IoT Hub connection string that you previously saved in Step #1.
- C: Select the option to Start Triggers this will automatically start all of the new triggers upon import.
- D: Click import when finished.
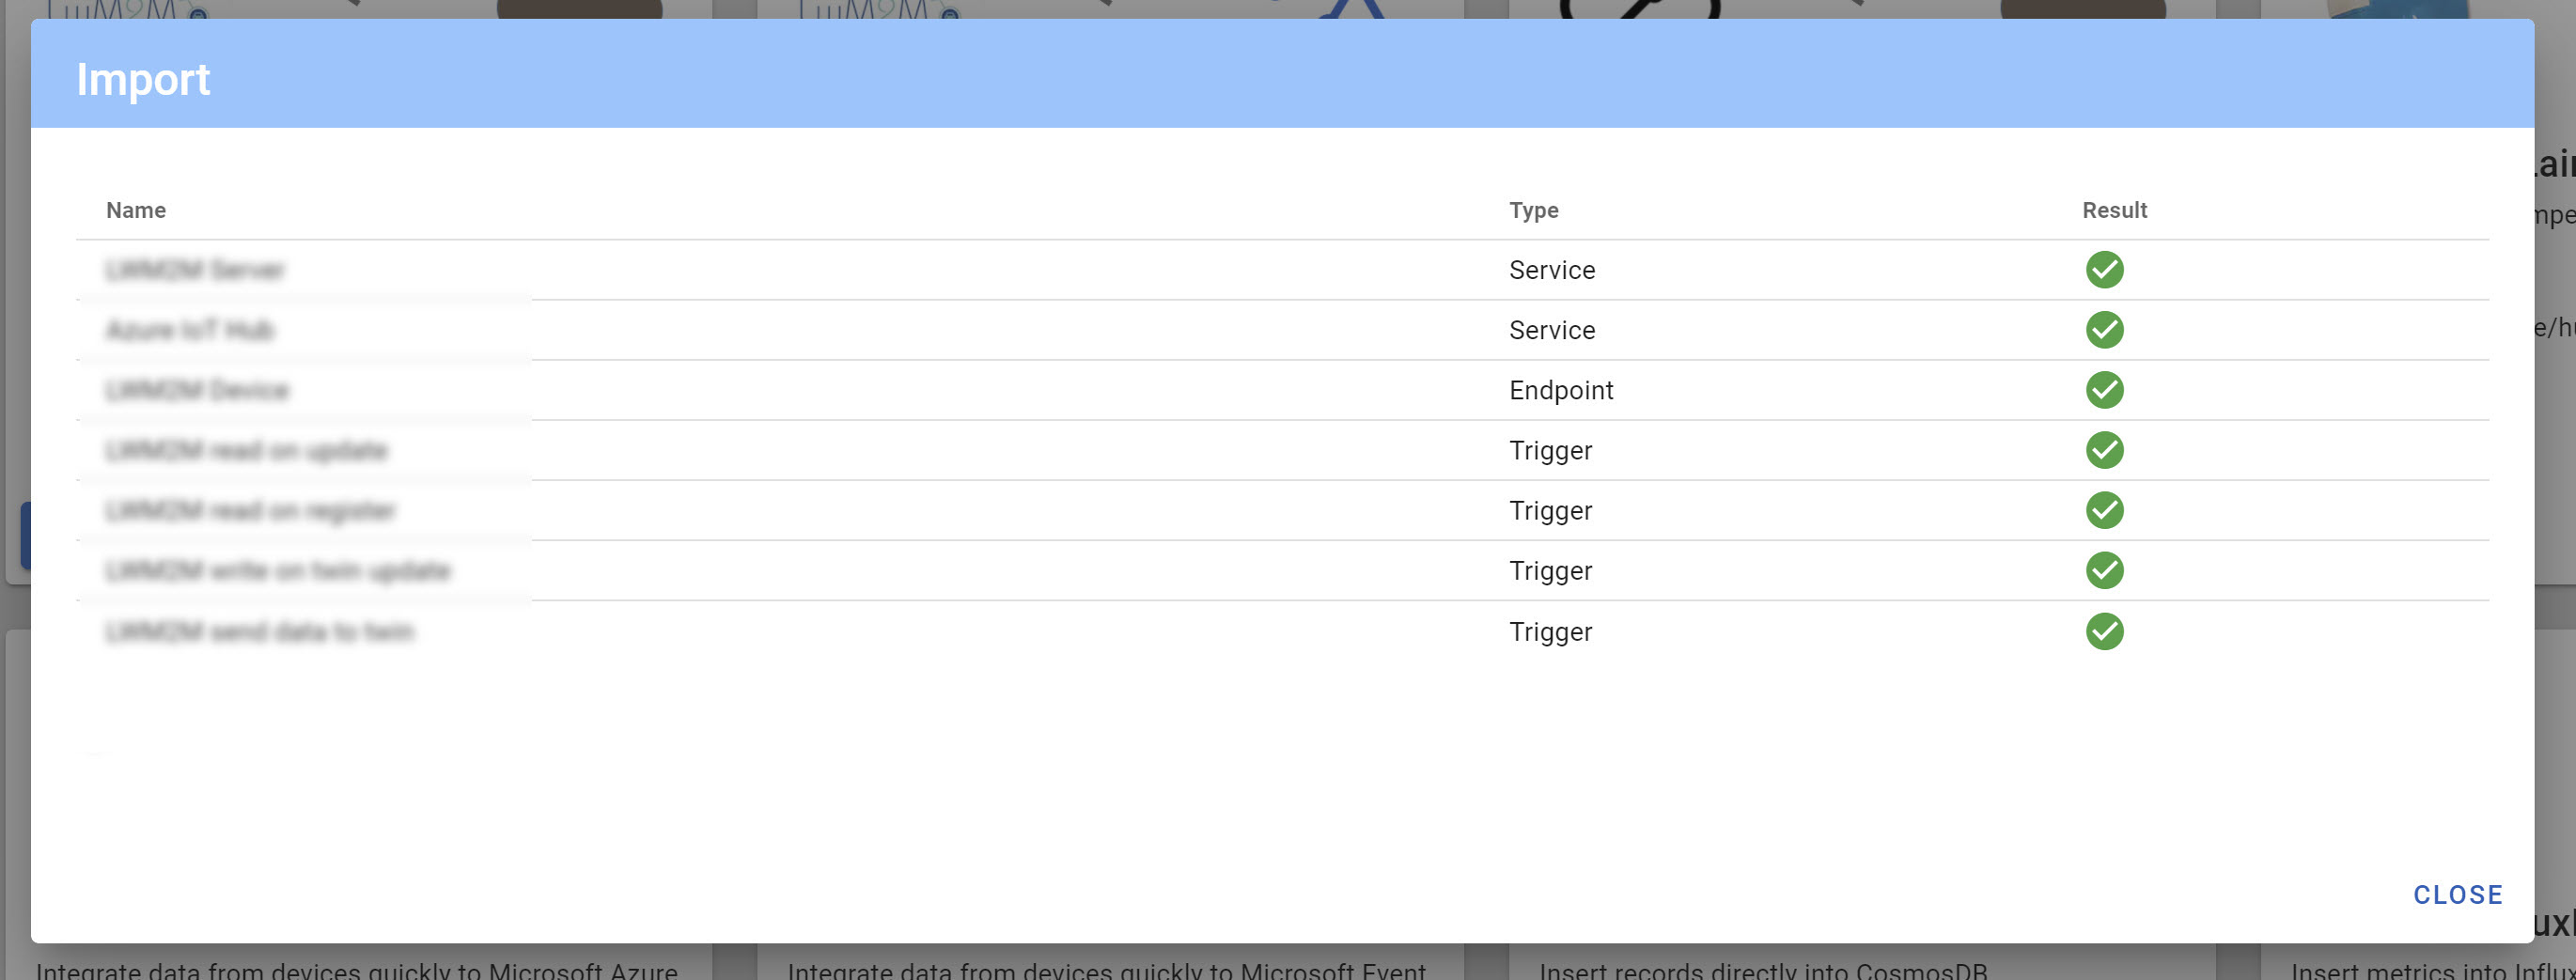
¶ 5. Verify the import was successful
You should receive an import result like this:
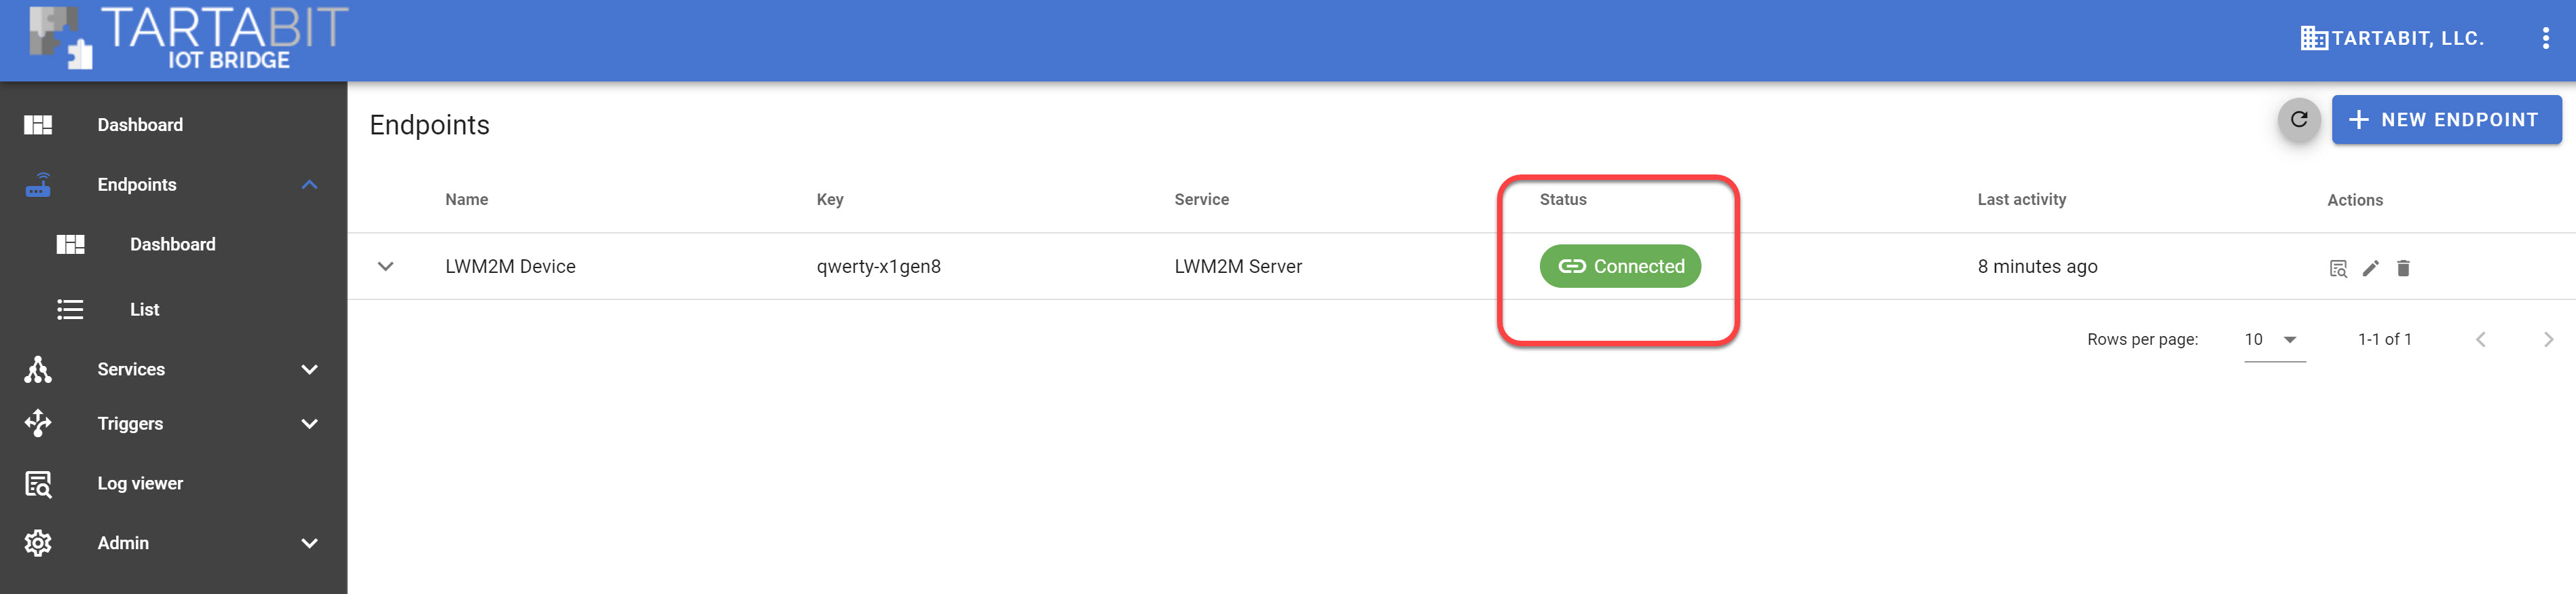
¶ 6. Connect your Queclink device
Now that everything has been imported, you can connect your first Queclink device.
Verify that the client is connected by navigating to Endpoints -> List and checking the status.
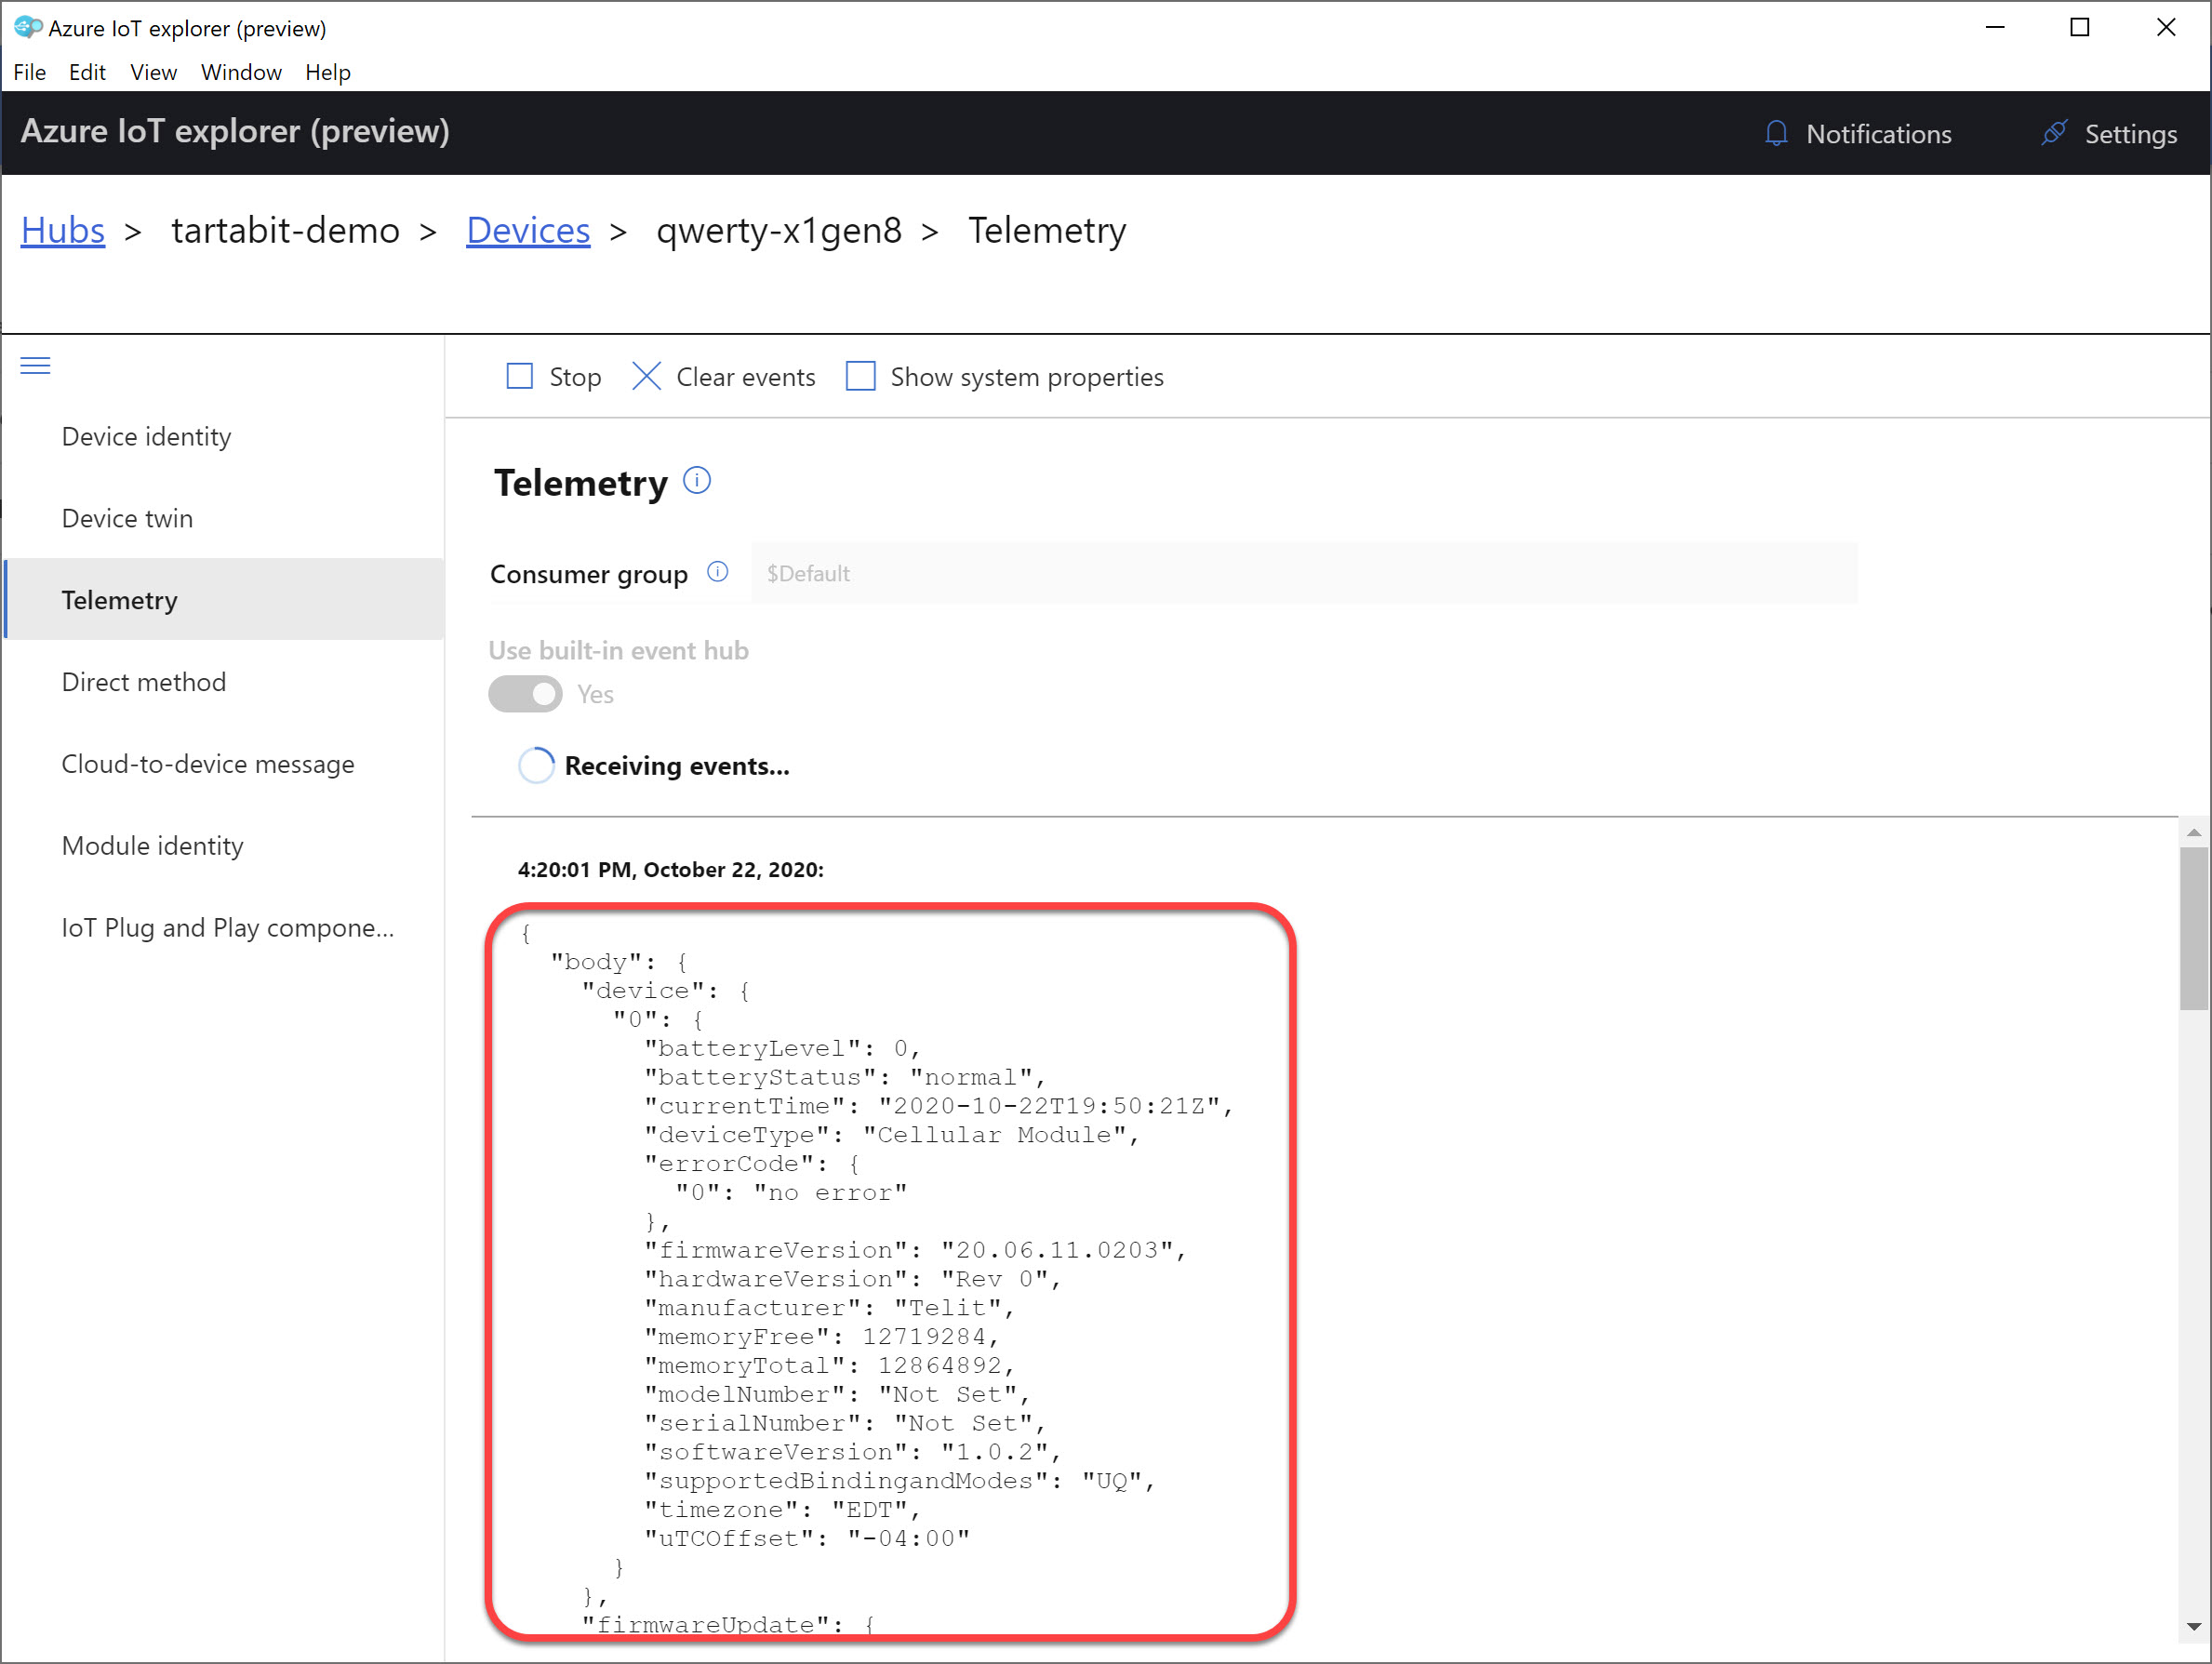
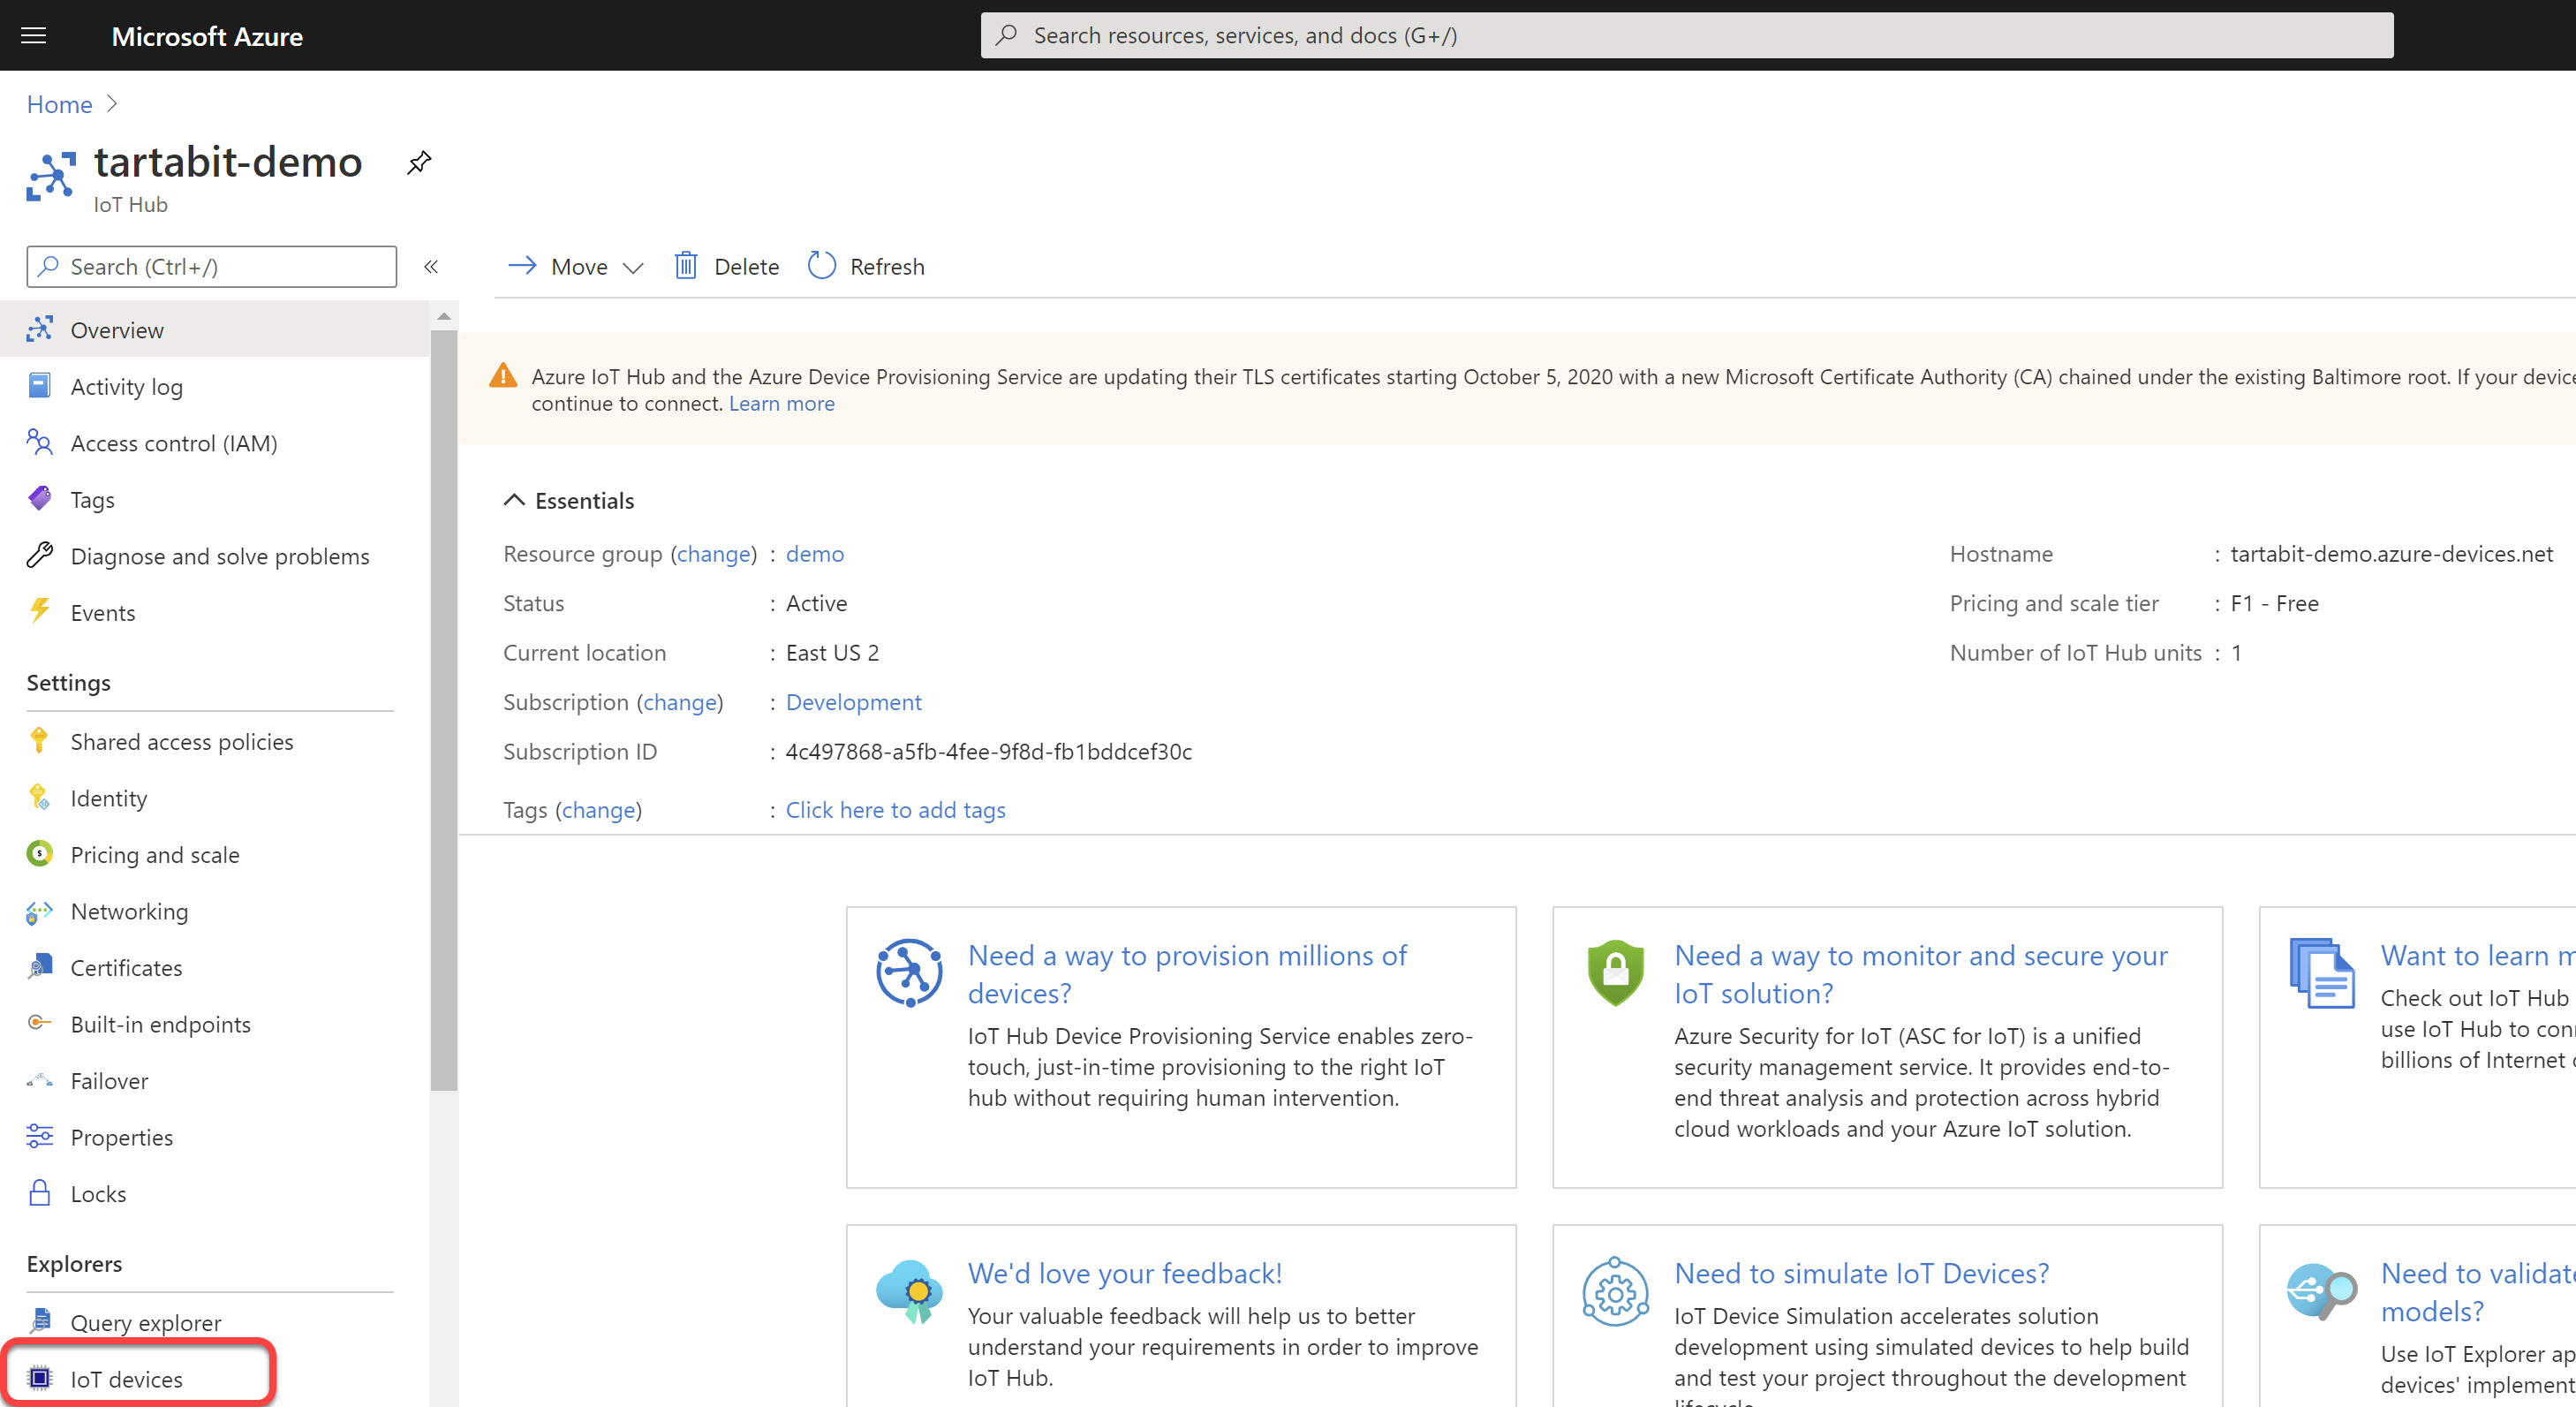
¶ 7. Check your device in Azure IoT Hub
With the device connected, you should now see it connected in the IoT Hub, and data being updated in the device twin.
- Navigate to your Azure IoT Hub
- Click IoT Devices
- You should see your newly created device, click on it.
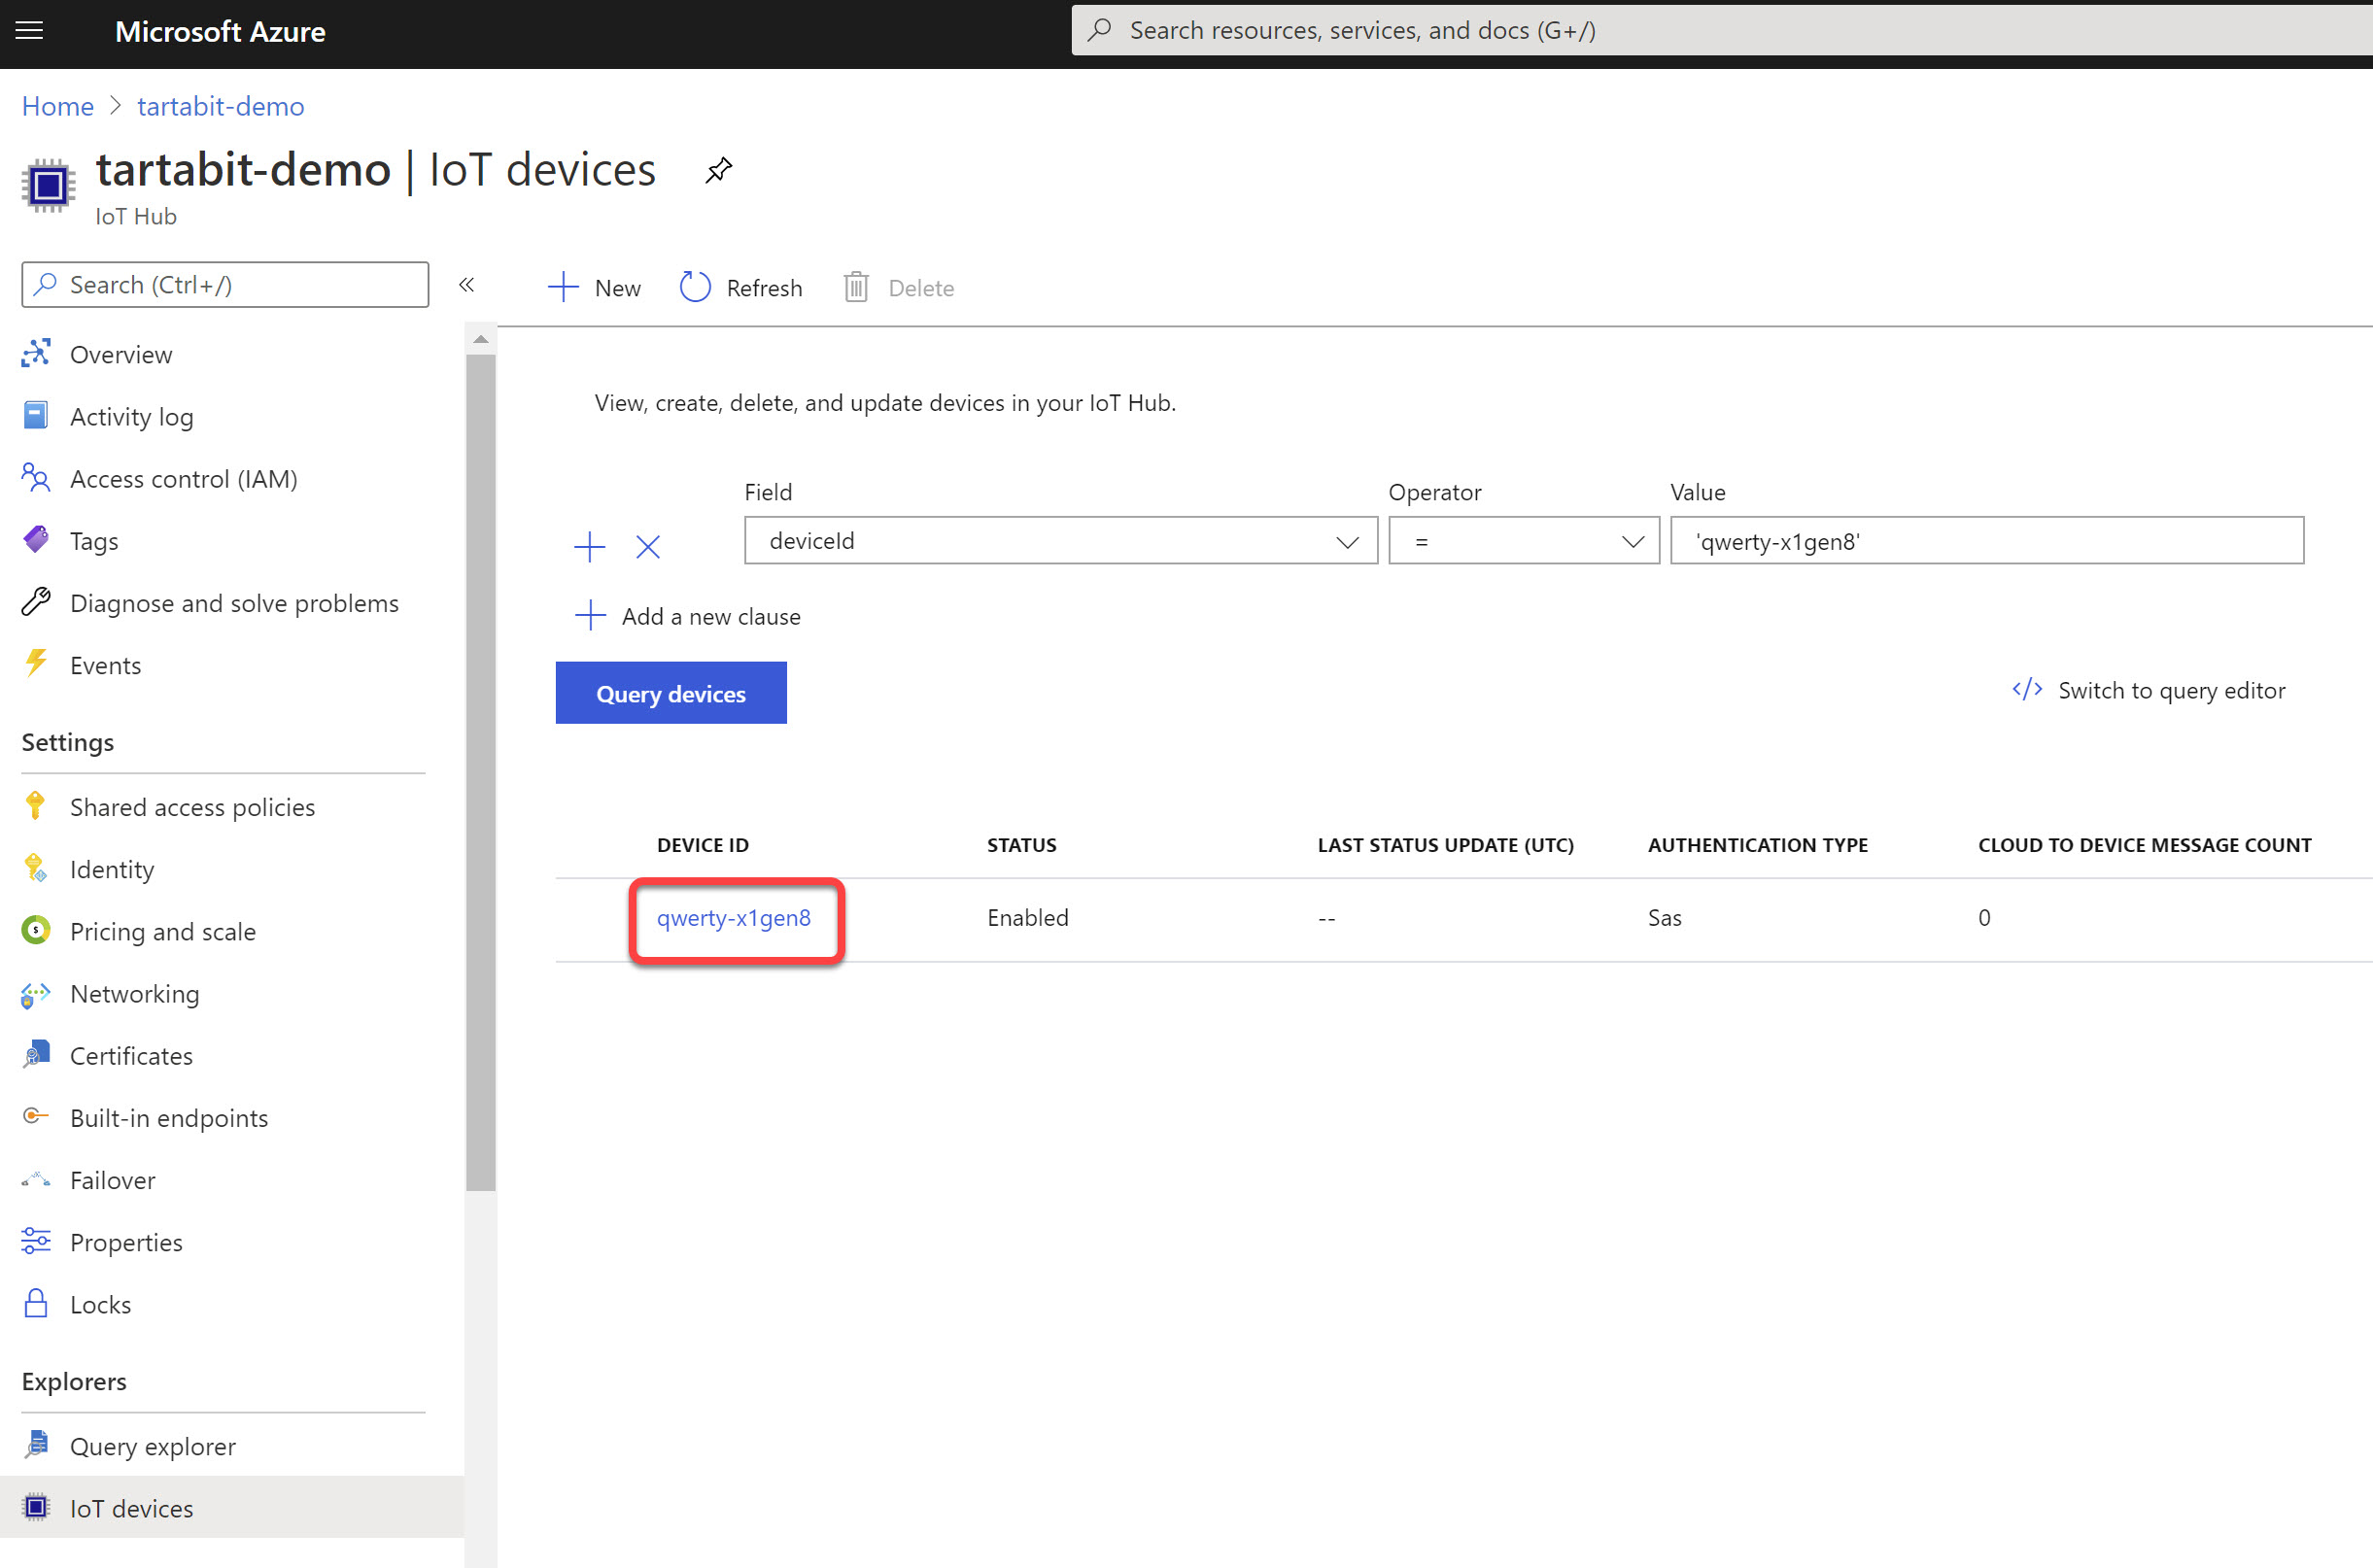
- Click on Device Twin

- You will see the LWM2M object data in your twin.

- You can use the Azure IoT Explorer to view the telemetry as well.